Hello my beauties! Today I wanted to go over my favorite face brushes. These are all my go-to brushes I can’t live without.
Tarte Airbrush Finish Foundation Brush ($34)
 This is the brush I recommend the most. This brush is perfect for everyday use or full coverage. I mainly use this brush for everyday light foundation application. It’s super soft yet very dense. I love how big it is so it makes the application process super fast and easy. I normally apply the foundation on my face first. I dab a little bit on my forehead, cheeks, chin, and nose. Then, I lightly buff the foundation in with brush using gentle circular motions. I don’t like to apply the foundation directly on the brush because I feel like it wastes too much product. This brush is on the pricier side, but it’s worth every penny in my opinion. Morphe brushes has a very similar brush. I haven’t tried their brushes so I can’t say anything as far as the quality goes, but if you are on a budget, you may wanna check it out.
Beauty Blender ($20)
 This may not be brush but it is the best tool to achieve a flawless look. It blends foundation and concealer perfectly. The only downfall is how long it takes to blend in. Not ideal for on the go. To save time I blend the foundation with a brush first and then I go in with the sponge. I also have the Real Techniques version. I think it’s a great dupe.
Bobbi Full Coverage Face Brush ($44)
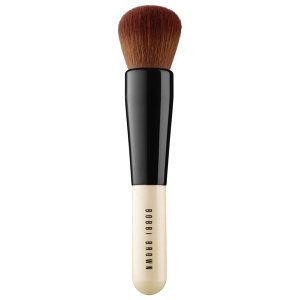 This is my go-to when I’m too lazy to use my beauty blender. This brush is perfect for traveling purposes because of the short handle. Its not as dense or big as the Tarte but it still applies a flawless application. This brush is great, but I’d recommend the two others above first.
Real Techniques Sculpting Brush ($10)
 I think all Real Techniques brushes are amazing. They are super affordable! I’d say this one is my favorite. I use this brush to set my concealer. It works great with loose powder or the Kat Von D Shade & Light Palette (yellow shade). I press the powder under my eye with the brush. I do not blend or buff it, I just press it onto the skin. This is what gives the flawless application. You need this brush!
Real Techniques Contour Brush (set $18)
I use this brush to apply my concealer. Works great. It’s the perfect size to blend concealer. And because it’s tapered, it’s easy to get in the inner corner. I later go in with my beauty blender if I want more coverage. Be sure to wash these often. It tends to carry a lot of product so if you don’t wash it, it doesn’t blend as good. This brush is included in the Core Collection set. It’s a great set to start off with.
Real Techniques Setting Brush ($8)
 This brush is great to set your concealer as well. I mainly use this for everyday purposes. I also like to use this brush to set my eye primer. Be sure to check out Ulta for these brushes. They often have them BOGO 50% off. Don’t forget the $3.50 off $10 coupon!
MUFE Large Powder Fan Brush ($48)
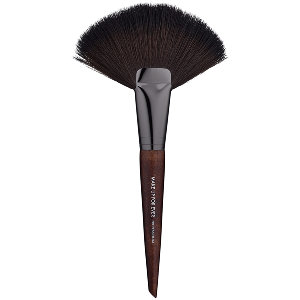 I’ve mentioned this brush a couple times now. I can’t say enough good things about it! It is PERFECT for contouring and applying bronzer. It’s even great to apply brush and highlight. Morphe brushes has various similar brushes as well. Check them out here. I’d say the Deluxe Fan or the the Jumbo Badger Fan are the closest. I know this one is pretty pricey.
If you haven’t checked out my post on my flawless foundation routine then check it out here. Stayed tuned for a post on my favorite eye brushes.
I hope this was helpful! Thanks for reading.
XO, Diana
 I am currently using the
  The KEY to a flawless face is setting it with powder. My favorite powder to set my concealer is the yellow shade (Lucid) in the
  Now the fun begins… First, I apply bronzer, the middle shade in the same Kat Von D palette. I hardly ever take the time to really sculpt my face. I’ve seen many people ask how to contour and what tool to use. I don’t think contouring is necessary more than half the time, just add a little bronzer and your good to go. I do believe the right brush is needed. I prefer to use a flat type of brush. I’ve been using the