Rothy’s Sandals


Who loves Rothy’s?? I DO! I DO! I was introduced to this brand a couple of years ago and have been in love ever since. In case you don’t know about this amazing company, Rothy’s is a sustainable brand that creates the most amazing shoes and recently bags. I have a few of their shoes and I love them all. My favorites being The Loafer.

They recently came out with incredible sandals. I was so luckily gifted The Knot style in Candy Apple from a wonderful person in my life.


Candy Apple

I had a really hard time deciding between these and The Triple Band. I was worried the knots wouldn’t fit as comfortable and slide out, but after walking around the house with them, I think they will be great! The straps hug my feet comfortably. They were a little snug but their material tends to stretch a bit and form your feet perfectly. I still have my eye on the Triple band tho!

Triple Band

Hot Pink Basket Stitch


San FranciscoThe Triple Band

The Triple Band


Why do I love Rothy’s?

  • Sustainability! Their signature thread is made from plastic water bottles, the outsoles are made from vegan leather and the footbeds are from plant-based materials.
  • Comfort. Every single pair I own is super comfortable and can be worn for hours. They are my favorite travel shoes!
  • Easy care! They are machine washable! Yeah, you heard that right. You can easily throw them in the washer and let them air dry. I’ve washed my loafers a few times and they look good as new every time.
  • Stylish! They have the most beautiful colors and patterns. Some of my favorites are olive and black camo.

The biggest con has to be the price. The sandals are $115 and the loafers being the most expensive at a whopping $165. I totally get why which is why I will continue to support this brand. I may or may not treat myself for my birthday in a couple of months! Maybe a handbag? AH! If only…

If you are a first time customer to Rothy’s and want $20 off your purchase, click this link here! Happy shopping!

XO, Diana

Sephora Collection Micellar Cleansing Milk – Review

Welcome back to skin care Friday! This week I wanted to tell you guys about the Sephora Collection Micellar Cleansing Milk. I have the Coconut Water formula. You can find these online or in-store at Sephora for $7.50.

Sephora Micellar water

Somehow I randomly came across this item online. I remember I really wanted to get one of the those VIB freebies you get sent by email so I chose this (I know I’m not the only one guilty of this lol). These come in two different textures: milk or water and they have 4 different formulas catered to different skin types/concerns:

I love anything that has coconut water in it so thats why I chose it. These are perfect for traveling. I feel like I always say that… I guess I am a sucker for anything travel size. But in all seriousness, its always struggle finding good cleansers for traveling. You can see in the picture it’s kind of thick and has that milky texture. Best way to apply is on a cotton pad and gently work it into your skin. 

Micellar water cleansers are meant to take off makeup without having to wash your face. I feel like these have taken over face wipes recently. At least for me anyway… These claim to be able to remove face and eye makeup. I have to disagree on the eye makeup part. I tried it and it burned my eyes and didn’t remove any of my mascara. I recommend using an eye makeup remover regardless of what base makeup remover you use. As far as removing my face makeup, I feel like it did a great job. I did experience a soothing effect. I did however, feel like it left my face a little sticky. A quick rinse fixes this problem. If I am wearing a lot of makeup I will use a cleansing oil beforehand.

Overall I’d give this product a 4 out of 5. I’d say it’s worth trying out. My favorite thing about this product is that they cater to all skin types. If you have super oily skin, the Green Tea one may be a great option for you. The price is a little bit higher than drugstore versions especially for only 3.38 fl. oz. The Garnier SkinActive Micellar Cleansing Water is $4 for the same size. I’ve never tried it but its def on my list! I’ve seen it at Ulta. 

Thanks for reading! Stay tuned for next week’s skin care item!

XO, Diana

Boscia Tsubaki Oil Deep Hydration Hydrogel Mask- Review

Welcome to skin care Friday! I want to start a series reviewing only skin care. I have so many skin care products and instead of just talking about my favorites, I want to review ALL of the products I own and try out. I love all skin care- face masks, moisturizers, oils, toners, you name it!

Right now I am really into sheet masks. I currently have about 15. This week I tried the Boscia Tsubaki Oil Hydrating Hydrogel Mask. I personally have never tried any products from their Tsubaki Oil line but I know it’s great for dry skin.

You can find sheet masks anywhere nowadays. They can range from $3 to $25. I purchased this one at Sephora for $8. I love sheet masks because they are so affordable and provide great skin care benefits.

IMG_0844.jpg

This mask claims to replenish, soften, and deeply hydrate the skin.

IMG_0843

The mask comes with two pieces and has a gel consistency. After trying this, I realized I prefer gel masks over the cotton ones. This one felt sooooooooo good on the skin. The only thing that’s annoying is that it is a little difficult to take out of the package and put on the face. Once its on, it molds really well to the face.

The instructions say to leave it on for 20 minutes. I think I left it for about 30. What I noticed about this mask is that my face absorbed the essence completely. I don’t really notice that with other masks. There was not much left on the skin after I took the mask off. The mask did exactly what it claims. The next day I woke up to soft dewy skin. It also got rid of the dryness I have around my nose.

Overall, I’d give this mask a 5 out of 5. I think it’s great for any skin types as well. This mask is great if you are looking for something to soothe and hydrate your skin. Def try this if you feel like pampering yourself. I personally do it every Sunday evening.

Here is a really awkward selfie. hehe. I just really wanted you to be able to see the mask in action.

IMG_0845


Stay tuned for next week’s review! Thanks for reading!

XO, Diana

Bite Beauty The Lip Pencil- Review

img_0432

I was so excited to receive this VoxBox from Influenster. I love lip liners just as much as I love lipsticks. These are available to purchase at Sephora for $18. They have 22 shades available. I received 020 Beige Nude and 044 Rich Mahogany. I have also been wanting to try the Amuse Bouche lipsticks. The lipsticks I received are Whiskey and Honeycomb.

img_0431

fullsizerender

Whiskey, 044, 020, Honeycomb

I love Bite Beauty and what they stand for. I knew these products weren’t going to disappoint. My favorite items from the brand so far are the Agave Lip Mask (I have original and champagne) and the Matte Creme Lip Crayons.

The packaging is super basic. Requires a sharpener. No biggie.

img_0429

Some of my favorite lip pencils are MAC Cosmetics and the NARS Velvet Lip Liners. Both of these brands are matte, so they have a thicker formula, and they’re a little tougher to apply. These from Bite Beauty are different. I gotta admit I am super impressed with these. They are super soft and creamy.  However, because of the creamy formula, it causes them not to last as long as the ones I mentioned. You’ll get a full 4 hours of wear using it alone without eating or drinking much. You will definitely have to reapply after a full meal. The best thing about these is that they are easy to apply and they are great to wear alone. They apply very evenly. In the picture below, I am only wearing Rich Mahogany. As you can see the color is very opaque. I’d say the finish is a semi matte. It feels very comfortable on the lips.
img_0732

In the following picture I am wearing both the lip pencil in Beige Nude and Honeycomb lipstick. The lipsticks are just as impressive. Very opaque and creamy. I have been on a nude lipstick kick lately- this combo is being added to the favorites. I also like to wear the Beige Nude liner with a simple gloss on top.
img_0567

Thanks to Influenster for sending me this box try!  I definitely want to purchase some. I have my eyes on Mauve Brown.

Thanks for reading!

XO, Diana


February 2017 Favorites

It’s been a while since I have done a favorites post. I’ve been using A LOT of new products the last fews months so I really want to tell you guys about them.

img_0438
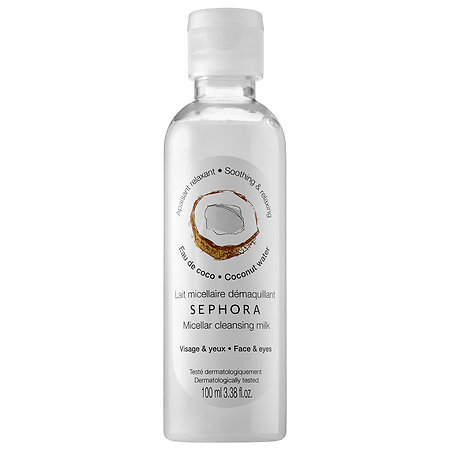
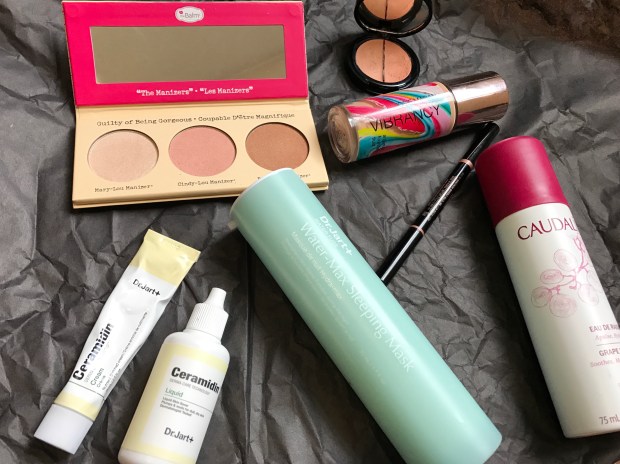
I want to start off with the items that have been saving my dry skin during these winter months.

Dr. Jart+ Ceramidin Liquid and Cream Duo $34

ceramidin

I purchased this duo at Sephora for $34. It comes with 1 oz of the Ceramidin Liquid and 0.5 oz of the Cream. I tried out the cream whenever Sephora had them as a 100 point perk. I love how moisturizing it is. A little goes a long way. I like to be stingy with this so I only use it in my really dry areas – nose and other dry spots. I do the same with liquid. I use the Belif Moisturizing Bomb on top all over my face. I would choose the cream over the liquid. I’m also interested in trying their tinted moisturizer. All of the Ceramidin products have amazing reviews.

Dr. Jart+ Water Fuse Water-Max Sleeping Mask $48

water max sleeping mask.jpg

This mask is supposed to lock in moisture while you sleep. I use it after I apply my serum and moisturizer (Origins Night-A-Mins). The mask basically seals your moisturizer so it can hydrate your skin all night. I love how calming and soothing it is. I wake up in the morning with soft skin. If my skin is super dry and flakey, I use it like 3-4 nights in a row and it definitely helps. I purchased mine during the Sephora VIB Sale. The regular price is $48.

Josie Maran Vibrancy Argan Oil Foundation $40

vibrancy-foundation

img_0038

This has been a great foundation for winter! I will tell you right now, this foundation isn’t meant for all skin types. I would stay away from this if you have very oily skin. It’s made with pure Argan Oil which is one of Josie’s most popular products. This foundation has a medium coverage. It’s very moisturizing and gives you beautiful glowing skin. It can cling on to dry patches but not nearly as bad as other foundations do. I also love the smell. I purchased mine on QVC for $40. It also came with a duo fiber brush. I prefer to use a beauty sponge to apply though. I chose the shade Medium RG50.

Anastasia Beverly Hills Brow Definer $23

brow-definer


I was honestly so surprised I liked this product. My mother actually had this and I decided to try it. I may or may have not have permanently borrowed it from her (hehe). I LOVE how natural it makes my brows look. It’s super easy and fast to use. It applies the perfect amount of product and blends effortlessly. I’m wearing it in the picture above.  I also feel like it lasts wayyyyy longer than the brow wiz does. This along with her brow gel is the shiiiiiiii… It’s $23 and the brow wiz is $21, but it contains more product than wiz. I’ve been using it everyday for a couple months and it’s still going strong.

The Balm Manizer Sisters $28

img_0440

I’ve been wanting to try the oh so famous Mary-Lou Manizer for the longest. When I saw this I knew it was the perfect time to try it out. I love how compact it is. Perfect for my makeup bag and traveling. I like the highlight, but I don’t think it’s as amazing as everyone claims it to be. I really love the blush. It has the perfect amount of shimmer. The bronzer was a bit too orange for my liking but it’s still pretty. I have used all three products together and you would think my face looked like a disco ball, but it worked. You can buy this product for $28. Sometimes The Balm has sales on their website so I’d keep an eye out for that.

Eve Pearl Dual Salmon Concealer $43

eve-pearl

I remember when I first started getting into makeup this product was all the rave. Six years later I finally purchased it and I’m glad I did. I bought on QVC.com for $43. It also came with a brush (that I really like btw). This contains a salmon colored corrector on the right and your skin shade on the left. The salmon shade works great to cover dark spots. I typically use the concealer shade to shape out my eyebrows. I don’t use both under eyes because it will cause major creasing. The only way I can apply this product is with my fingers. The warmth of your finger makes it really blend in. It doesn’t blend well with a brush at all. I think it’s because my undereye area is too dry. So far this is my favorite orange/peachy corrector!

Caudalie Grape Water $13

grape-water

My friend told me how much she liked this product so of course I had to try it. I’ll be honest this product doesn’t do much to my skin, it just makes me feel fancy AF. It is pure grape water. It is very soothing and does calm any redness or irritation. It’s not life changing by any means, I just love the way it feels. I like to use it in the morning and night after removing any makeup. I will definitely be repurchasing.

I mentioned quite a few skin care products in here. I have been using so many new skin care products lately. I will have a blog post on just skin care soon.

Thanks for reading.

XO, Diana

LipSense Review

Most of you have probably heard of LipSense. And if you’re like me, you’ve probably been curious to try, but didn’t want to spend the money on it. I did receive this product to review, but this is my 100 percent HONEST review.

If you know me, you know lipsticks are my jam. Sometimes I feel like liquid lipsticks have ruined regular lipsticks for me. I have super high standards for lipsticks and let me just tell you now that these didn’t disappoint.

IMG_0031.jpg

Oops Remover not included 

Packaging

I received the starter kit. It comes with the color of your choice, the moisturizing gloss (top coat), and the oops remover. The packaging is pretty basic, they all have your basic doe foot applicator. I chose the color Purple Reign. It’s such a beautiful bright violet. Perfect for Spring coming up.

lipsense-prices

There are over 70 different colors to choose from. You can also mix colors to create new ones. There is also a matte top coat available. These are cruelty free, vegan, and gluten free. All products are made in the USA with natural ingredients.

Application

It has very detailed steps on how to apply. See below:

instructions.jpg

As you can see, the instructions are very detailed. The doe foot applicator it contains actually made it very simple to apply. I first lined my lips with the tip of the applicator and then filled the rest in. It does feel very awkward keeping your mouth open the whole time. I ended up doing about 3-4 layers of the color because I wanted a very opaque color. So the first time I applied my lips were cracked. It burned like a B****! It feels like you are putting straight up alcohol on your lips. The burning sensation went away after I put on the top coat. It didn’t burn the second time I tried it. I dislike how long the application process takes. It takes me 5-10 minutes every time. But I guess it’s ok since you don’t have to worry about your lipstick for the rest of the day.

img_0038

Longevity

When you first apply, it’s super glossy. I prefer matte lipsticks so this is a bit different for me. I didn’t find myself having to reapply the gloss throughout the day because my lips felt moisturized. My lips were still somewhat shiny after seven hours of wear. As far as the color goes, it was just as opaque as it was when I first applied it. I do love that these don’t transfer… LIKE AT ALL.

Removing the product was fairly easy. I layered the Oops remover on my lips and then used a makeup wipe to remove the rest. The second time around I used a cleansing oil and a makeup wipe as well. The cleansing oil worked just a good, if not, better. Coconut oil, witch hazel, or olive oil would work just as great. You could save yourself $10 and just purchase the color and gloss.

Overall, I think this is a great product. I do think the price tag is a little high especially since the first purchase you make will be at least $45. But to be honest, there isn’t any other product out there that does what LipSense does. You will not find another product that stays glossy and doesn’t transfer for hours. This is a great product for brides, prom, or any other special occasion. I will definitely be purchasing a nude color.

So, do I recommend this? Absolutely. I’m actually very happy I had the opportunity to try. Now I feel like I wish I would’ve tried these a long time ago. 

A huge thank you to Martha for allowing me to try this product. If you are interest in Lipsense, please check out her page HEREThere are several pictures of swatches available on her page.

Thank you so much for reading.

XO, Diana

Anastasia Beverly Hills Master Palette by Mario- First Impression

Welcome back! The Master Palette by Mario just came out a few days ago and I was able to get it online at Anastasiabeverlyhills.com before it sold out. I wanted to do a post to tell you my thoughts and show you some swatches. It’s currently available online at Sephora, Macy’s, and Ulta. It should be sold in stores very soon. You can purchase it for $45.

img_5766

Enter a caption

This is my very first Anastasia palette so I was very excited to try it. The packaging is very simple and practical, yet elegant. The eyeshadows are very creamy and buttery. There is only one shade that is not very pigmented and that is Hollywood. It is the very first swatch on the left and you can barely see it on my skin tone. I absolutely LOVE all of the matte shadows. The colors are just perfect. My favorites so far are Isabel, Violeta, Bronx, and NYC. The only bad thing I have to say about the formula is that it does have a lot of fall out. I noticed it especially when I used Bronx. I would just be careful when using. If you are using the darker colors, then I would do foundation and concealer last. The palette is also a lot smaller than I thought it was going to be.

img_5783

with flash

IMG_5773 (1).jpg

img_5774

I purchased this palette because I am a huge fan of Mario and I wanted to be a supporter. It’s a very beautiful palette. I would say it definitely reflects Mario and his style of work. Would I have purchased this if it weren’t a collaboration with Mario? Probably not to be honest. I think all of the neutral shades can be found in other palettes I have like the UD Naked. Claudia, Bronx, and Muse are probably the only shades I don’t have in my collection. If you love Mario and his work then I would definitely recommend purchasing. Especially if you do not have shades like the ones included. It’s a great all over neutral palette with the perfect shades to give you a pop of color.

IMG_5982.JPG

I used Lula, Isabel, Violeta, Bronx, and 5th Ave.

Thanks for reading!

XO, Diana


Make Up For Ever Ultra HD Invisible Cover Stick Foundation Review

Welcome back, my loves! Today I will be reviewing the Make Up For Ever Ultra Hd Stick Foundation. I’m going to make this short and sweet because I LOVE this foundation. I received this product in my very first VoxBox from Influenster and I’m sooooooooooo glad I did!  You can purchase this guy at Sephora for $43 and with 15 shades available, you are bound to find your shade.

mufe-stick

Packaging:

The packaging is very simple. The lid snaps on and off easily and it has a little tab to keep the foundation fresh. All you have to do is twist up and apply! It’s great for traveling. You don’t have to worry about your foundation leaking.

Pros:

I have struggled to find the perfect full coverage foundation for a while. A lot of foundations claim to be full coverage but they’re not. This is not the case. This foundation can totally be built to FULL COVERAGE. Usually the more coverage foundations have the more matte or cakey they are. I love this because it leaves a very natural dewy flawless finish. It does not get cakey at all. My skin is extremely dry at the moment from the weather transitioning to Fall. This does not cling on to my dry patches as much as others do, so for me that sealed the deal. I’d say this is more of a winter foundation rather than a summer. It’s also great for any special occasion where photos will be taken.

Don’t be afraid of the full coverage. This can also be used as a light everyday foundation.

Cons:

I think the price of $43 is a little hefty, especially since you only get 0.44oz. The average size of a foundation is around 1oz. The biggest negative about this foundation is that it really sinks into your pores. Like bad…. And I don’t really even have big pores! To fix this problem I use a primer. The MUFE Smoothing Primer does the trick. I would not recommend this to very oily skin. You could probably get away with it if you have combo to oily, but you would definitely have to set it with powder.

How I apply:

For a lighter coverage, I apply a couple swipes on my cheeks, one on forehead and chin, and sometimes I’ll add a little bit more around my nose. Then, I’ll add a few sprays of Fix Plus to a buffing brush. The blending process is fairly easy after that. Setting powder isn’t necessary for me when I do this.

img_5657

Lighter coverage

I like to use my beauty blender for a full coverage look. I prefer to apply the foundation in layers. Apply, blend, apply, blend, etc.. etc.. I lightly apply my Kat Von D loose setting powder (review here) all over my face after I set my concealer.

fullsizerender-1

full coverage


There’s not much of a difference in both photos. That shows you just how good this foundation photographs!

A huge thank you to Make Up For Ever for allowing me to try this amazing product! I hope you enjoyed!

XO, Diana

Colourpop Love Bug, Lumiere 2, and Limbo Ultra Matte Lipsticks

img_5325Hello everyone! I made a purchase a few weeks ago during Colourpop’s Labor Day sale. I purchased three Ultra Matte Lips for under $12! For every $10 you spent you got a free lipstick. I already own a handful of these, but I wanted a couple more options for Fall. I purchased the shades Love Bug, Lumiere 2, and Limbo. Love Bug was the shade I got for free.

Love Bug

img_5327

Love Bug is described as a Terracotta red. Call me crazy, but I don’t think I have anything like this. I love this color! This is definitely my favorite out of the 3 I purchased. It appears much darker on the lips once its dried. I wish it was more similar to the actual shade of the tube, but I still love it! The formula of this one is also very different. It’s thicker, easier to apply, and not watery like the others.

Lumiere 2

img_5326

This shade is a dusty mauve. I don’t have the original Lumiere but I believe it’s lighter. The only color similar from my collection is Too Faced Queen B. Lumiere 2 is a bit darker. You can check out my review on Queen B here. Even though the formula to this one is watery, it’s not difficult to apply.

Limbo

img_5320

Limbo is a deep chocolate brown. For the longest time I was not a fan of brown lipsticks. I finally decided to give one a try and before I spent over $20 on one, I decided to go with a more affordable one first. I actually disliked this one the most. It was SUPER watery and soooooo difficult to apply. It took me three tries to finally get it right. I liked how the color looked with my eyeshadow, but I don’t think I will ever use this one again. I have my eyes on Too Faced Naughty by Nature or Smashbox True Grit.

img_5289Overall, I would recommend Love Bug and Lumiere 2. Love Bug for sure! It’s a great shade for Fall. Colourpop is so affordable and they always have a $5 coupon that practically covers shipping.

Thanks for reading!

XO, Diana

Kat Von D Lock-It Setting Powder vs Laura Mercier Translucent Loose Setting Powder

I’m back with another review. Today I’m comparing the new Kat Von D Setting Powder to the super popular Laura Mercier Translucent Setting Powder. Both of these products are translucent once they are blended into the skin, so they are perfect for all skin shades.

FullSizeRender

I’ve had the KVD powder for a little over month now. This powder is described as, “A weightless translucent loose powder, formulated with Micro-Blurring Technology™, to set and perfect for a flawless, locked-in finish.” The product is very much what the description says.

IMG_5087

Price:

I purchased the Kat Von D powder at Sephora for $30. The LM powder is a little more expensive for $38. However, you do get a little more product in the LM, 1.0oz. The KVD contains 0.67oz.

Packaging:

Kat Von D’s packaging NEVER fails. She always has the coolest designs on her packaging. Overall the packaging is pretty similar. They both have a screw on lid. Sometimes the KVD lid can be a little tricky to screw on. I think it’s because the jar is made out of pretty durable acrylic. Both products are easy to spill on lid to dip your brush or sponge.

Texture:

They are both pretty finely milled but I think the KVD may be even a little bit more finely milled. The LM looks like it’s a tad bit more yellow. If you look closely in the KVD you can see tiny shimmery particles. When swatched it looks like it has more of a silky finish. The LM looks a bit chalky when swatched and compared to the KVD.

IMG_5096

Left LM, Right KVD

Application:

I usually only set my under eye area with powder. I prefer to use my beauty blender when doing so. If I apply on other areas of my face then I use a fluffy brush and gently dust on face. In the picture below, I am wearing KVD on the left and LM on the right. As you can see they have a very similar finish. They both also blend into the skin very well. I have not experienced a white cast in flash photography with either of these products. Also, neither one of these oxidize or alter the color of your foundation.

IMG_5051

The biggest difference in these is that the LM clings on to dry areas. Since I have dry skin, I have definitely experienced this before. For that reason I cannot use the LM in the winter. KVD on the other hand doesn’t really do that. The picture below is close up and unedited. You can clearly see the right side looks a bit more dry/crusty than the left side.

IMG_4728

Left KVD, Right LM

Overall:

I personally prefer the KVD because I have dry skin. If you already own LM then you don’t need to purchase the KVD unless you have super dry skin. If you don’t own either, I think I’d still go with KVD because of the texture and satin finish. The LM is definitely more matte so if thats what you like then go with that one.

Processed with VSCO with hb2 preset

I love camo… can you tell?

The KVD is also great for everyday use. I used the Erborian BB creme in the picture above. I also used the new KVD concealer. That review will be up next.

Thanks for reading!

XO, Diana