kat von d

Kat Von D Lock-It Setting Powder vs Laura Mercier Translucent Loose Setting Powder

I’m back with another review. Today I’m comparing the new Kat Von D Setting Powder to the super popular Laura Mercier Translucent Setting Powder. Both of these products are translucent once they are blended into the skin, so they are perfect for all skin shades.

FullSizeRender

I’ve had the KVD powder for a little over month now. This powder is described as, “A weightless translucent loose powder, formulated with Micro-Blurring Technology™, to set and perfect for a flawless, locked-in finish.” The product is very much what the description says.

IMG_5087

Price:

I purchased the Kat Von D powder at Sephora for $30. The LM powder is a little more expensive for $38. However, you do get a little more product in the LM, 1.0oz. The KVD contains 0.67oz.

Packaging:

Kat Von D’s packaging NEVER fails. She always has the coolest designs on her packaging. Overall the packaging is pretty similar. They both have a screw on lid. Sometimes the KVD lid can be a little tricky to screw on. I think it’s because the jar is made out of pretty durable acrylic. Both products are easy to spill on lid to dip your brush or sponge.

Texture:

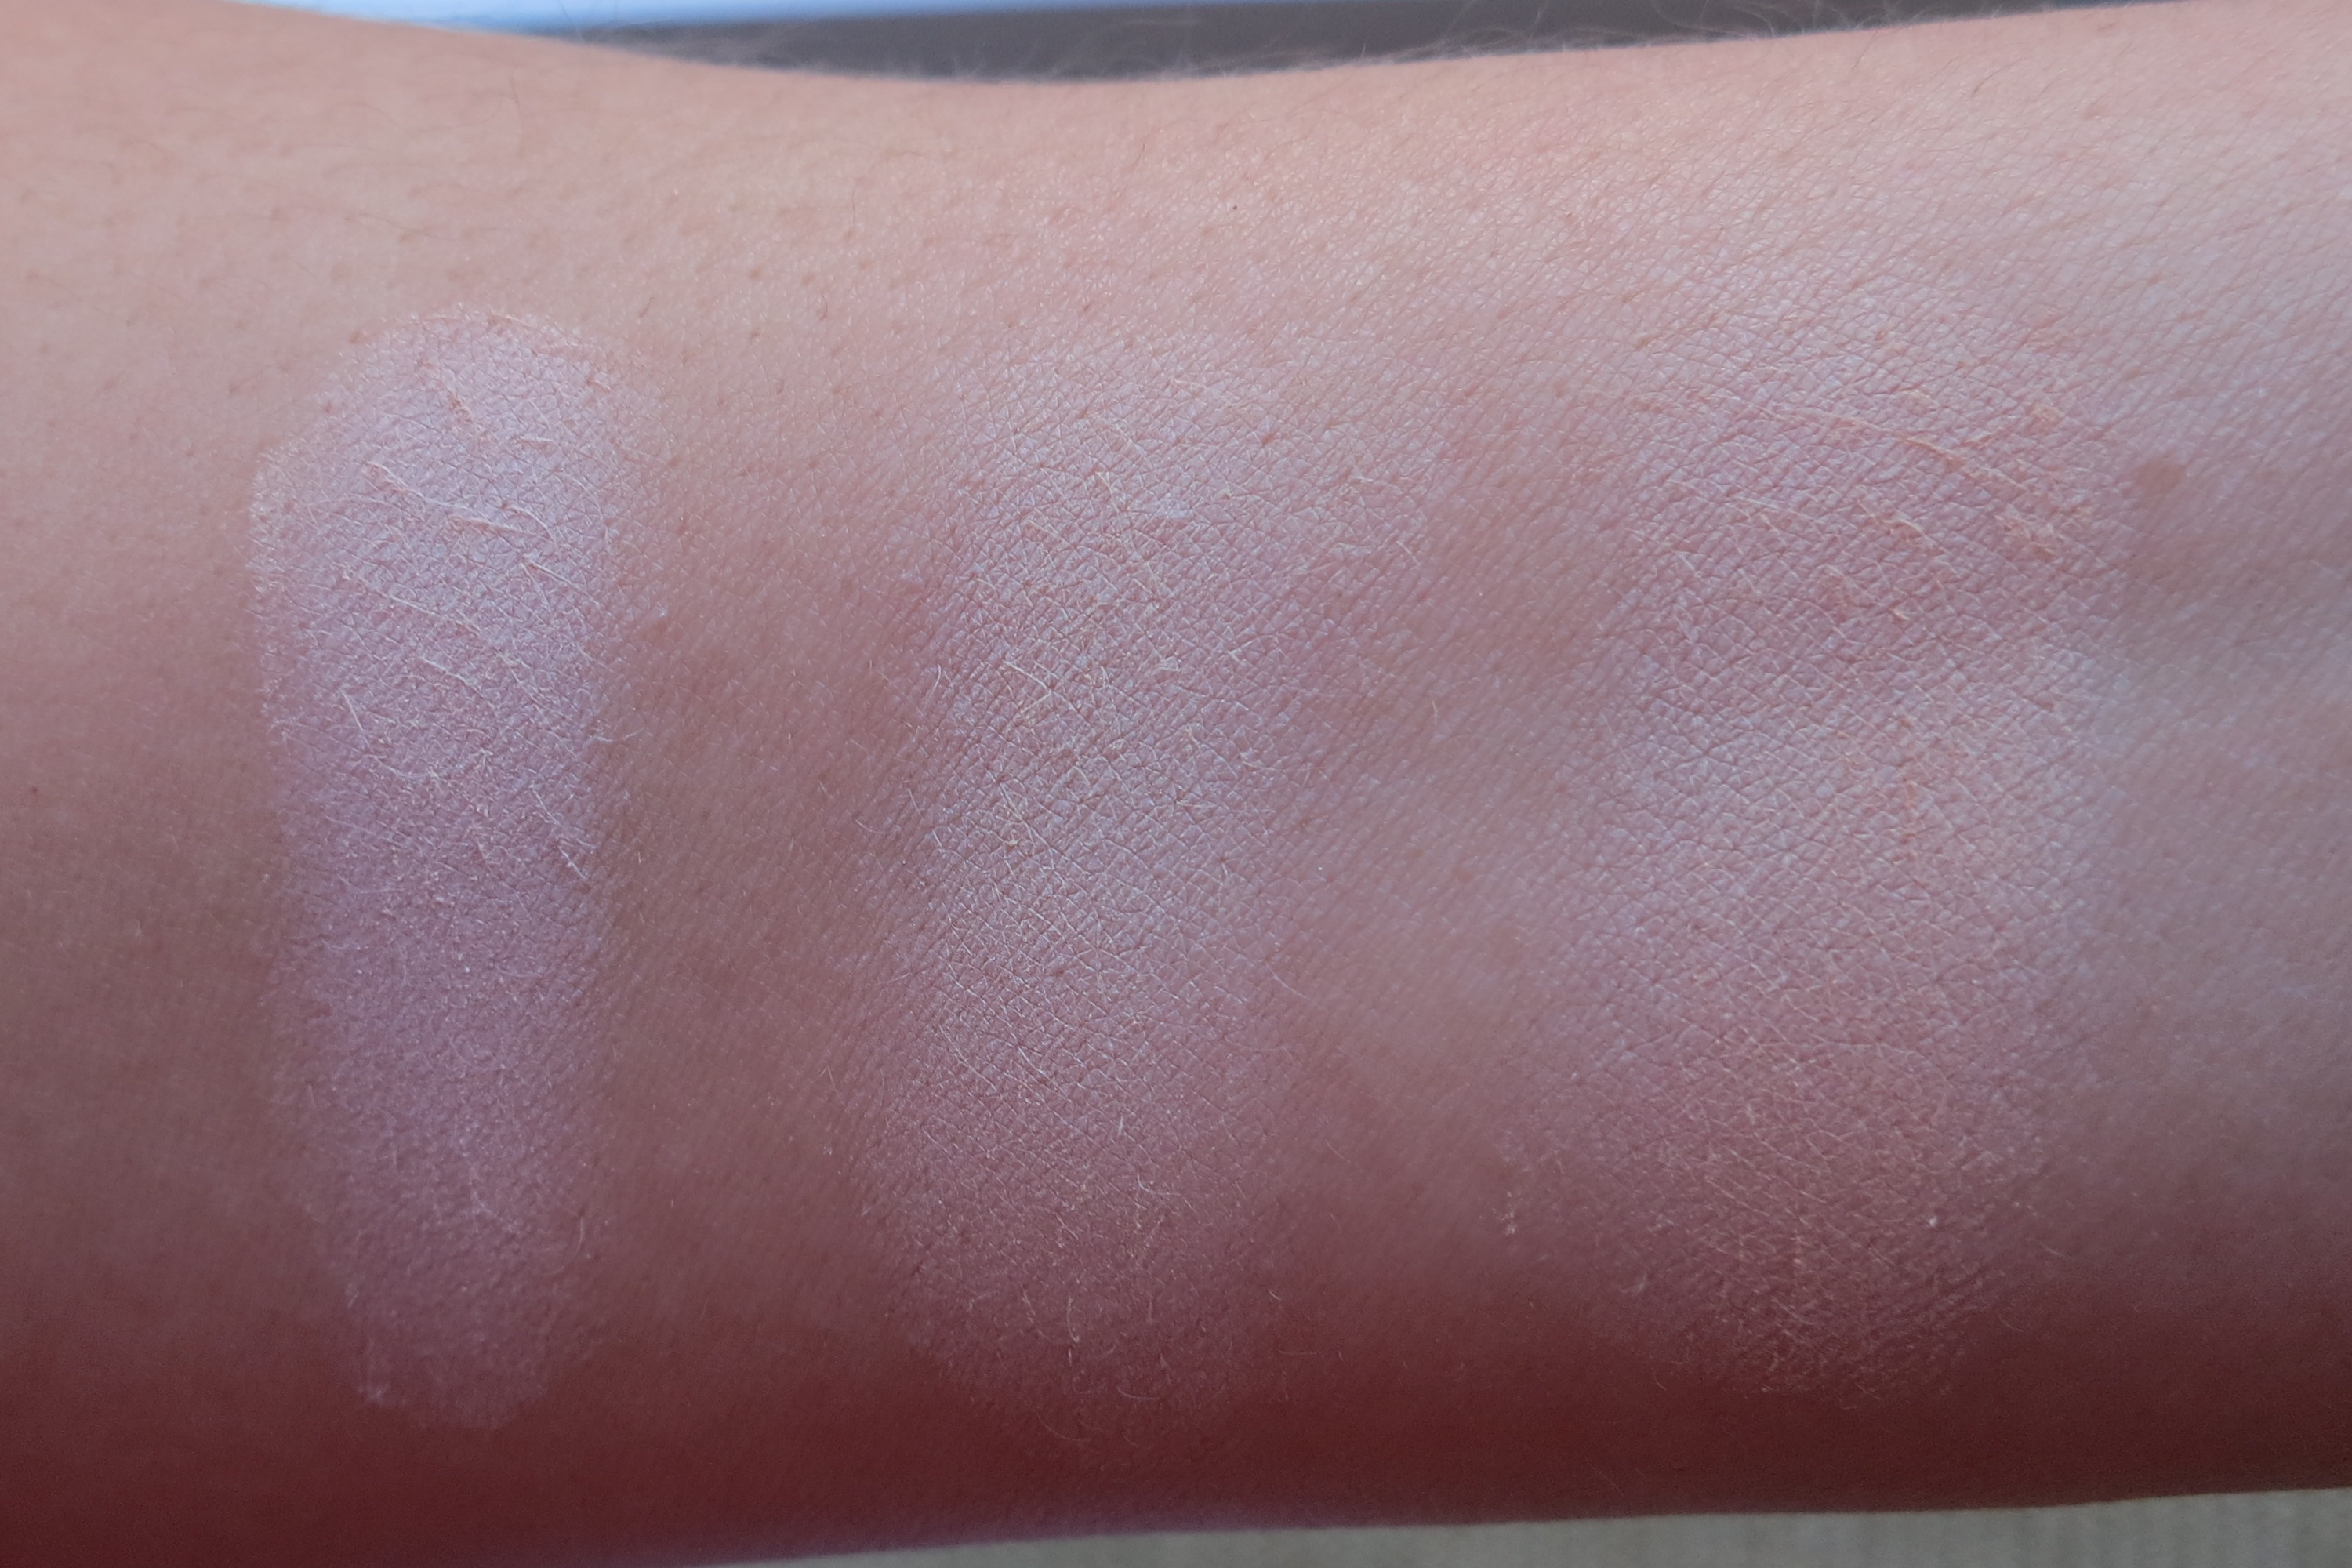
They are both pretty finely milled but I think the KVD may be even a little bit more finely milled. The LM looks like it’s a tad bit more yellow. If you look closely in the KVD you can see tiny shimmery particles. When swatched it looks like it has more of a silky finish. The LM looks a bit chalky when swatched and compared to the KVD.

IMG_5096

Left LM, Right KVD

Application:

I usually only set my under eye area with powder. I prefer to use my beauty blender when doing so. If I apply on other areas of my face then I use a fluffy brush and gently dust on face. In the picture below, I am wearing KVD on the left and LM on the right. As you can see they have a very similar finish. They both also blend into the skin very well. I have not experienced a white cast in flash photography with either of these products. Also, neither one of these oxidize or alter the color of your foundation.

IMG_5051

The biggest difference in these is that the LM clings on to dry areas. Since I have dry skin, I have definitely experienced this before. For that reason I cannot use the LM in the winter. KVD on the other hand doesn’t really do that. The picture below is close up and unedited. You can clearly see the right side looks a bit more dry/crusty than the left side.

IMG_4728

Left KVD, Right LM

Overall:

I personally prefer the KVD because I have dry skin. If you already own LM then you don’t need to purchase the KVD unless you have super dry skin. If you don’t own either, I think I’d still go with KVD because of the texture and satin finish. The LM is definitely more matte so if thats what you like then go with that one.

Processed with VSCO with hb2 preset

I love camo… can you tell?

The KVD is also great for everyday use. I used the Erborian BB creme in the picture above. I also used the new KVD concealer. That review will be up next.

Thanks for reading!

XO, Diana


Flawless Foundation Routine

Hello beauties! I’ve been asked a few times what products I use to achieve a flawless face. In this post I’m going to show you all of the products I use including the most important tools.

Step 1: Moisturize and Prime

I’ve been using the Belief True Cream Moisturizing Bomb (rewards), Origins Ginzing Eye Cream, and the YSL Blur Primer (deluxe sample). I apply the primer in the center of my face and around my mouth.

Step 2: Apply Foundation and Concealer

IMG_2426I am currently using the Too Faced Born This Way Foundation and the NARS Radiant Creamy Concealer. My foundation is in the shade Natural Beige and my concealer is in the shade Custard. The concealer is about one shade lighter than my skin tone. I normally use the UD Naked Concealer, but my under eyes are a little to dry for that one right now. I also love using the MAC Pro Longwear Concealer.

The most important tool to use when blending in foundation and concealer is the Beauty Blender. The only thing I dislike about using it is how long it takes takes to blend. Feels like foreeevvveerrrr. But it works and it’s the only tool that blends everything flawlessly.  I first apply my foundation and then my concealer. If I really want to highlight under my eye then I apply the concealer in a triangle formation. I also apply it on my chin, cupid’s bow, tip of the nose, and the center of the forehead. I blend my concealer with the beauty blender as well.

Step 3: Set Foundation and Concealer

IMG_2423The KEY to a flawless face is setting it with powder. My favorite powder to set my concealer is the yellow shade (Lucid) in the Kat Von D Shade and Light Palette. This really highlights the under eye and makes it look flawless. To do this, I use the Real Techniques Sculpting Brush. I gently press it on the same areas I applied concealer. I NEVER blend in, just press onto the skin.

To set the rest of my face I use the NARS Light Reflecting Loose Setting Powder. You can use any kind of brush for this. I normally use a larger powder brush. I feel like the NARS powder is underrated. People rave about the Laura Mercier one, but I hardly ever see anyone mention this one. I’ve never tried LM (it’s on my list), I’m sure it’s great, but this one gets the job done too. This product also works great for the ‘baking’ technique.

Step 4: Bronze, Blush, and Highlight

mufeNow the fun begins… First, I apply bronzer, the middle shade in the same Kat Von D palette. I hardly ever take the time to really sculpt my face. I’ve seen many people ask how to contour and what tool to use. I don’t think contouring is necessary more than half the time, just add a little bronzer and your good to go. I do believe the right brush is needed. I prefer to use a flat type of brush. I’ve been using the MUFE Large Powder Fan Brush.  This brush is amazing and makes bronzing/contouring so easy! It allows you to create the perfect line. I also run the brush across my nose, top of forehead, and around jawline. You could also use this brush to apply blush and highlight. It’s a huge brush so it takes a while to get used to holding it. But once you do, you’ll love it!

IMG_2397

After applying bronzer, highlight, & blush

Finally, I apply blush and highlight. Those two vary from time to time. Lately I have been using a Tom Ford blush/highlight duo that came out last year in their holiday collection.

Step 5: Setting Spray

I don’t really like my face to look too powdery so I always apply a setting spray. My go-to’s are MAC Fix Plus and Urban Decay All Nighter Spray. If I want my makeup to last all day and night then I use the Urban Decay.

I also wanted to mention that if I am wearing a lot of eyeshadow, like a smokey eye, then I do that first. I normally apply the foundation, then the eyeshadow, and then the concealer. This way you can easily clean up any fallout or mistakes. You can really use that concealer to clean up the eyeshadow.

So there you have it. Those are all of the steps I do to achieve a flawless look. I usually do this about once a week. I prefer a lot less steps and makeup on a day to day basis.

IMG_2428

*Eyebrows: Diorshow Brow Styler, Eyeshadow: KVD Shade + Light Eye, Liner: KVD Tattoo Liner, Lips: Colourpop Ultra Matte Lip in More Better.

Thanks so much for reading. I hope this was helpful. Please do not hesitate to ask any questions!

XO, Diana


Shade of the Day- Lolita II

IMG_1993
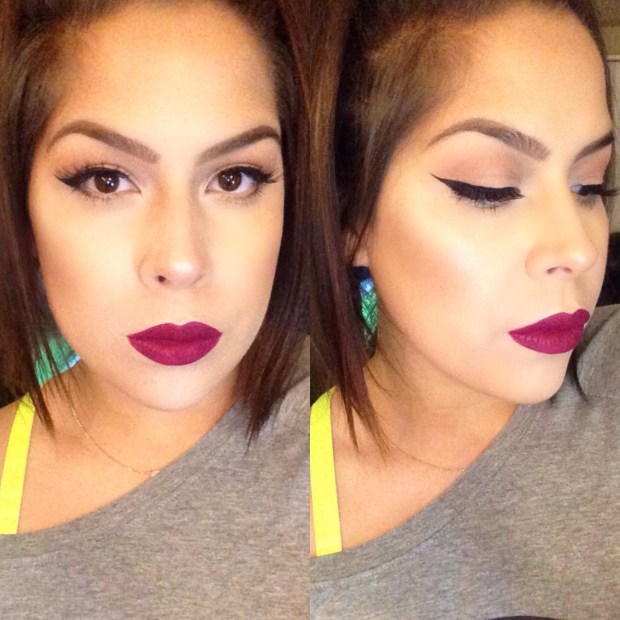
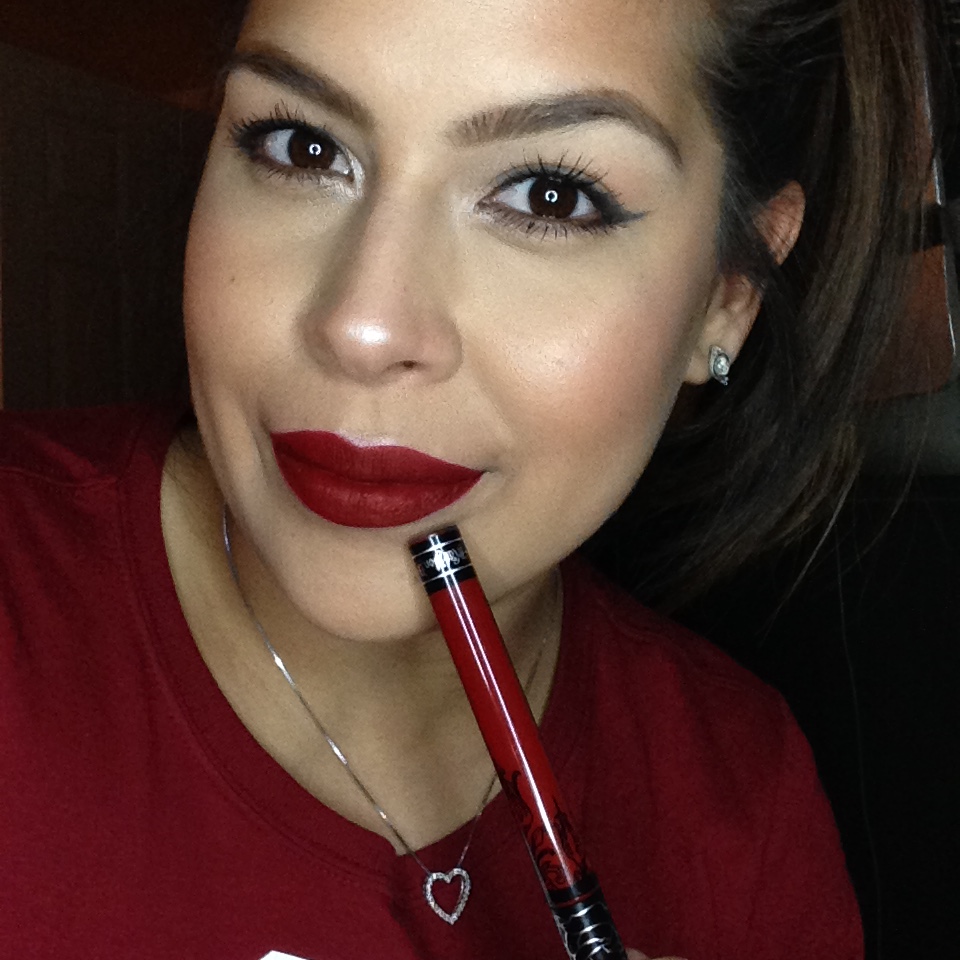
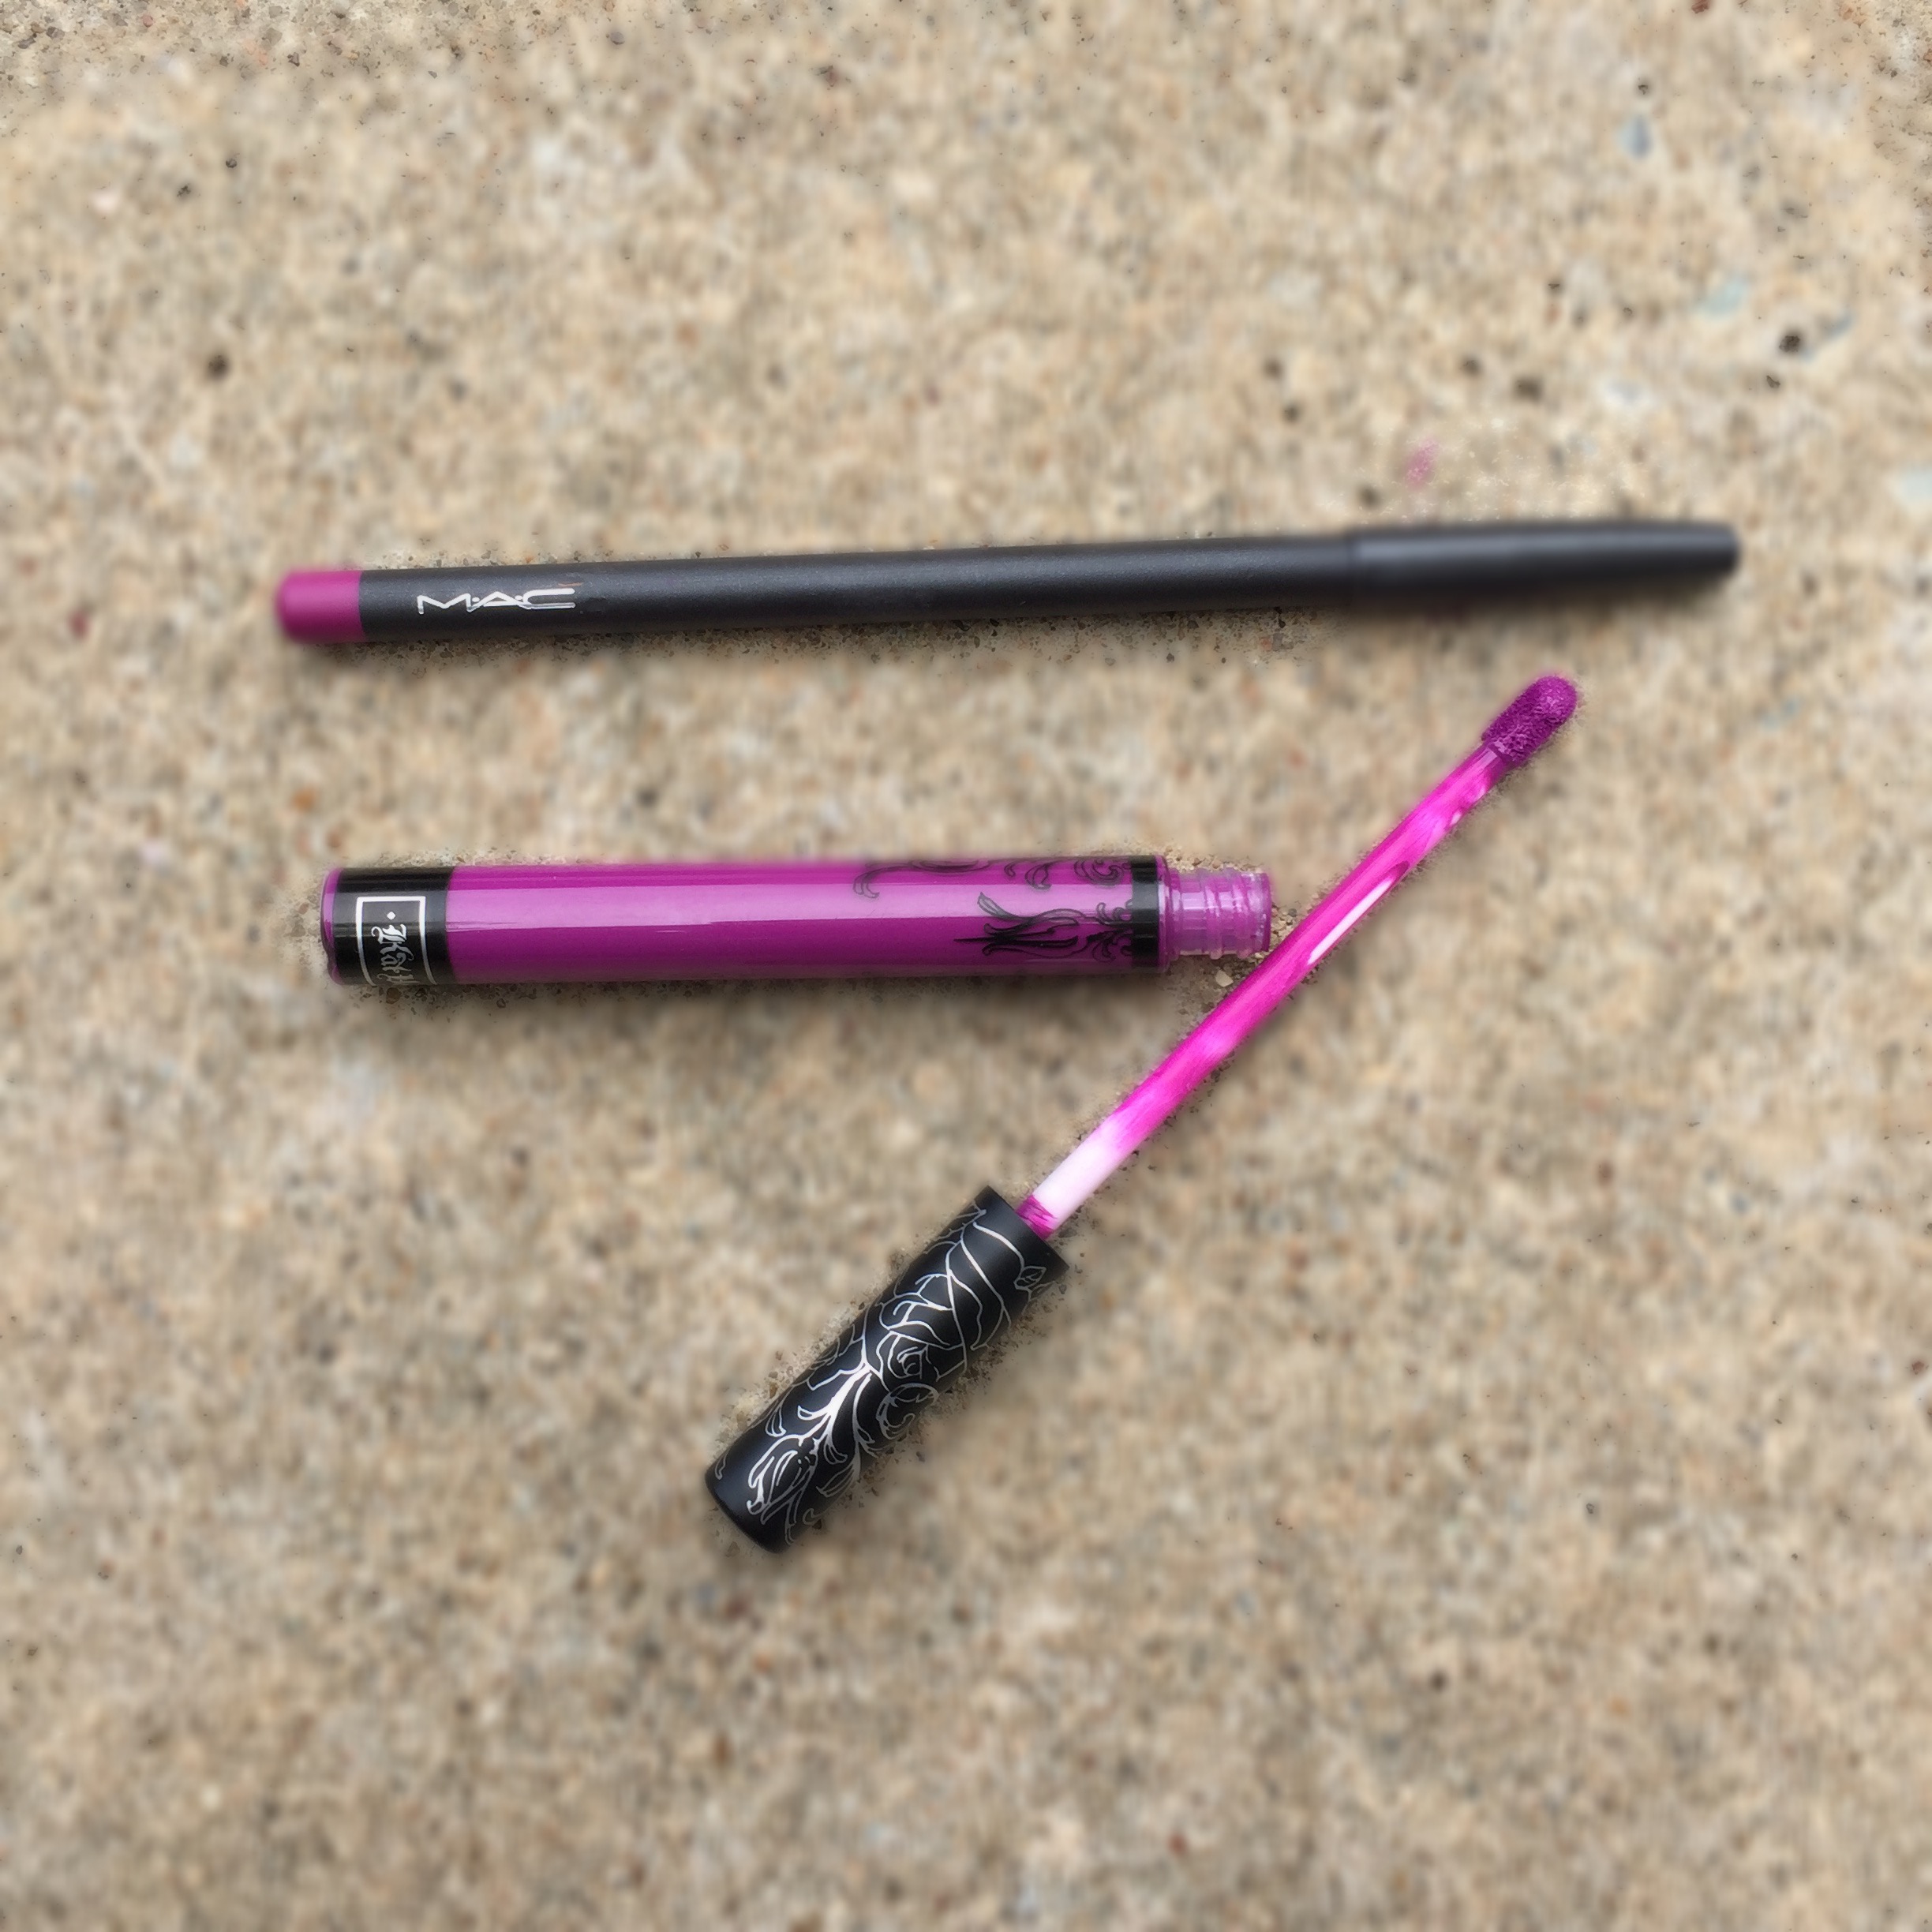
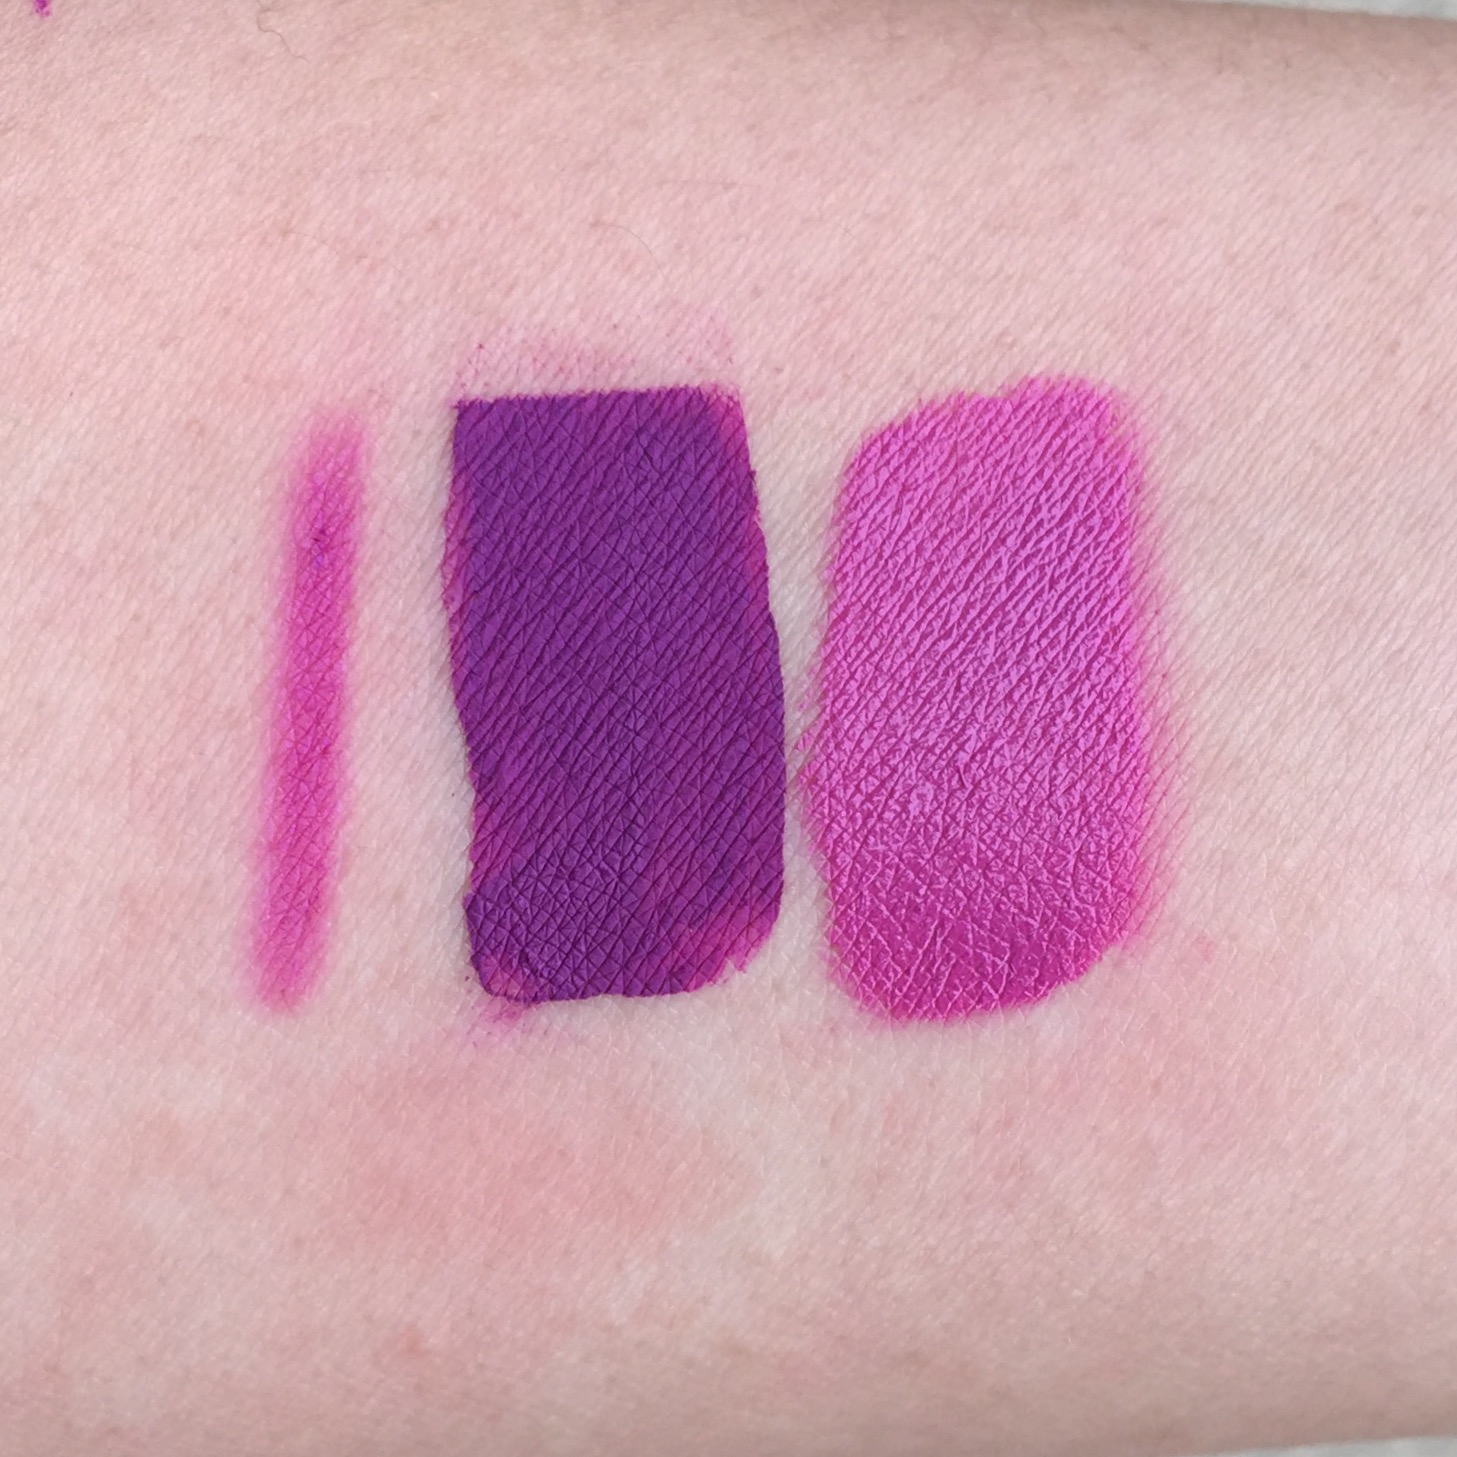
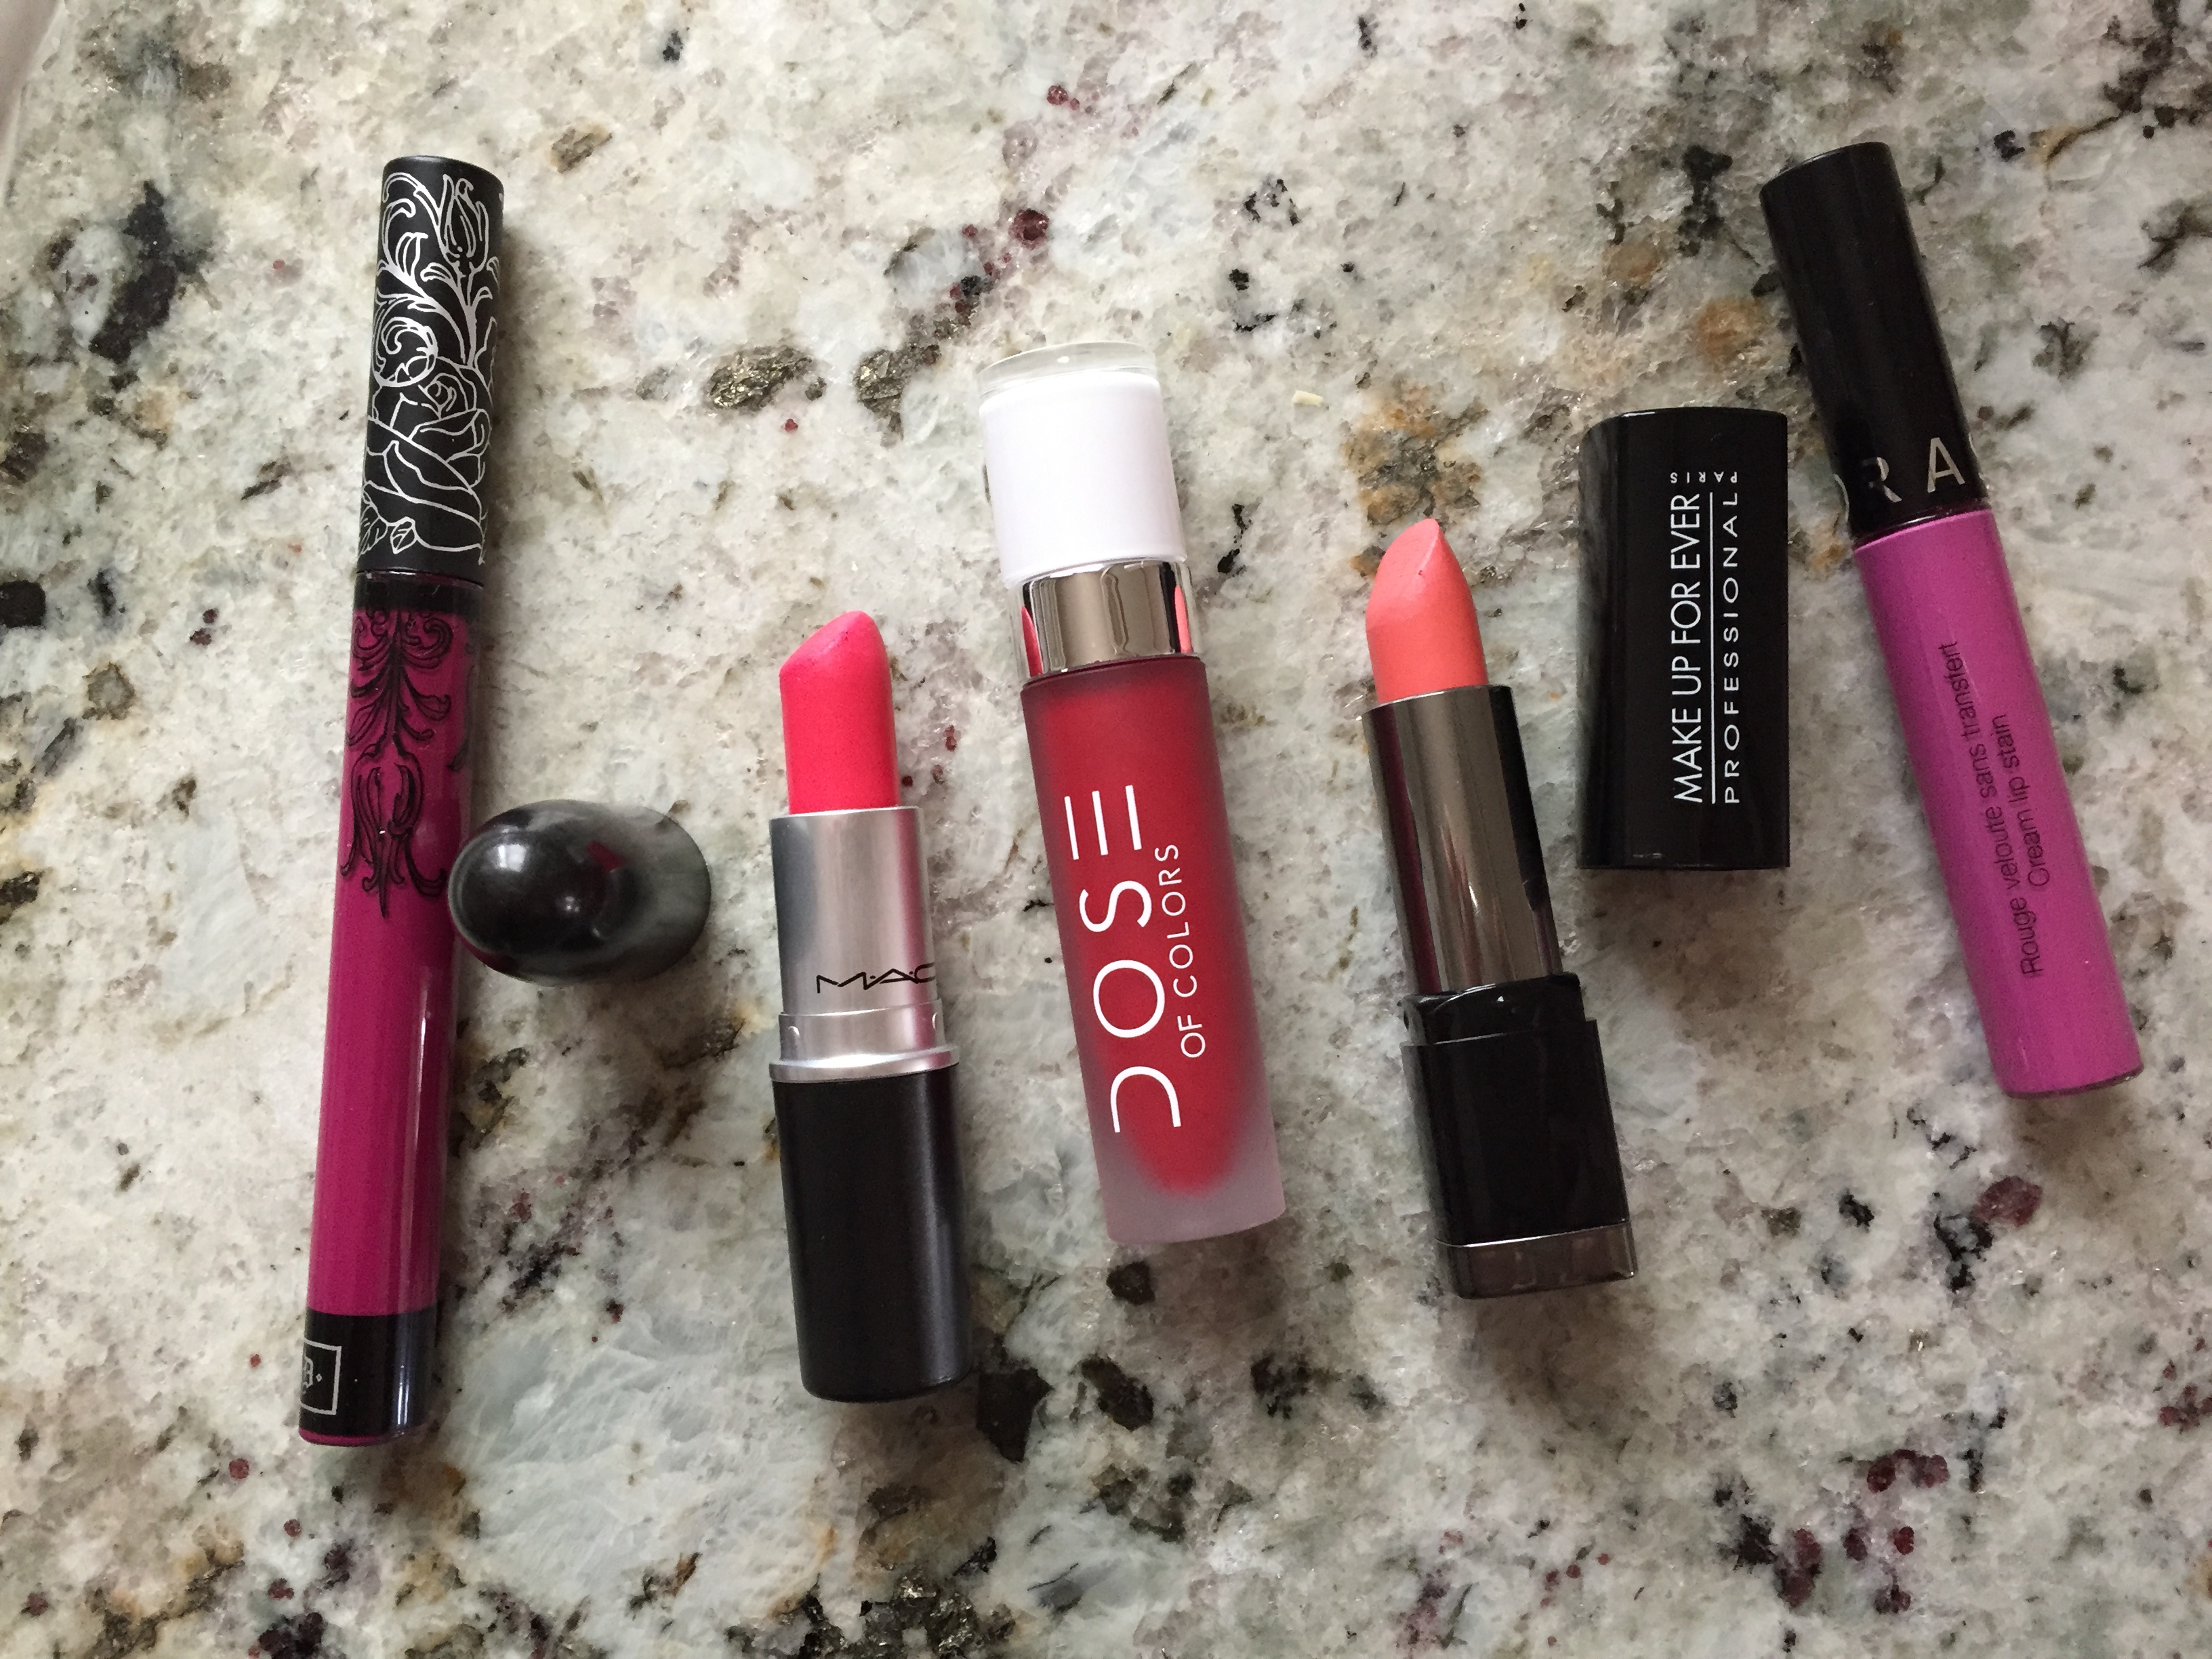
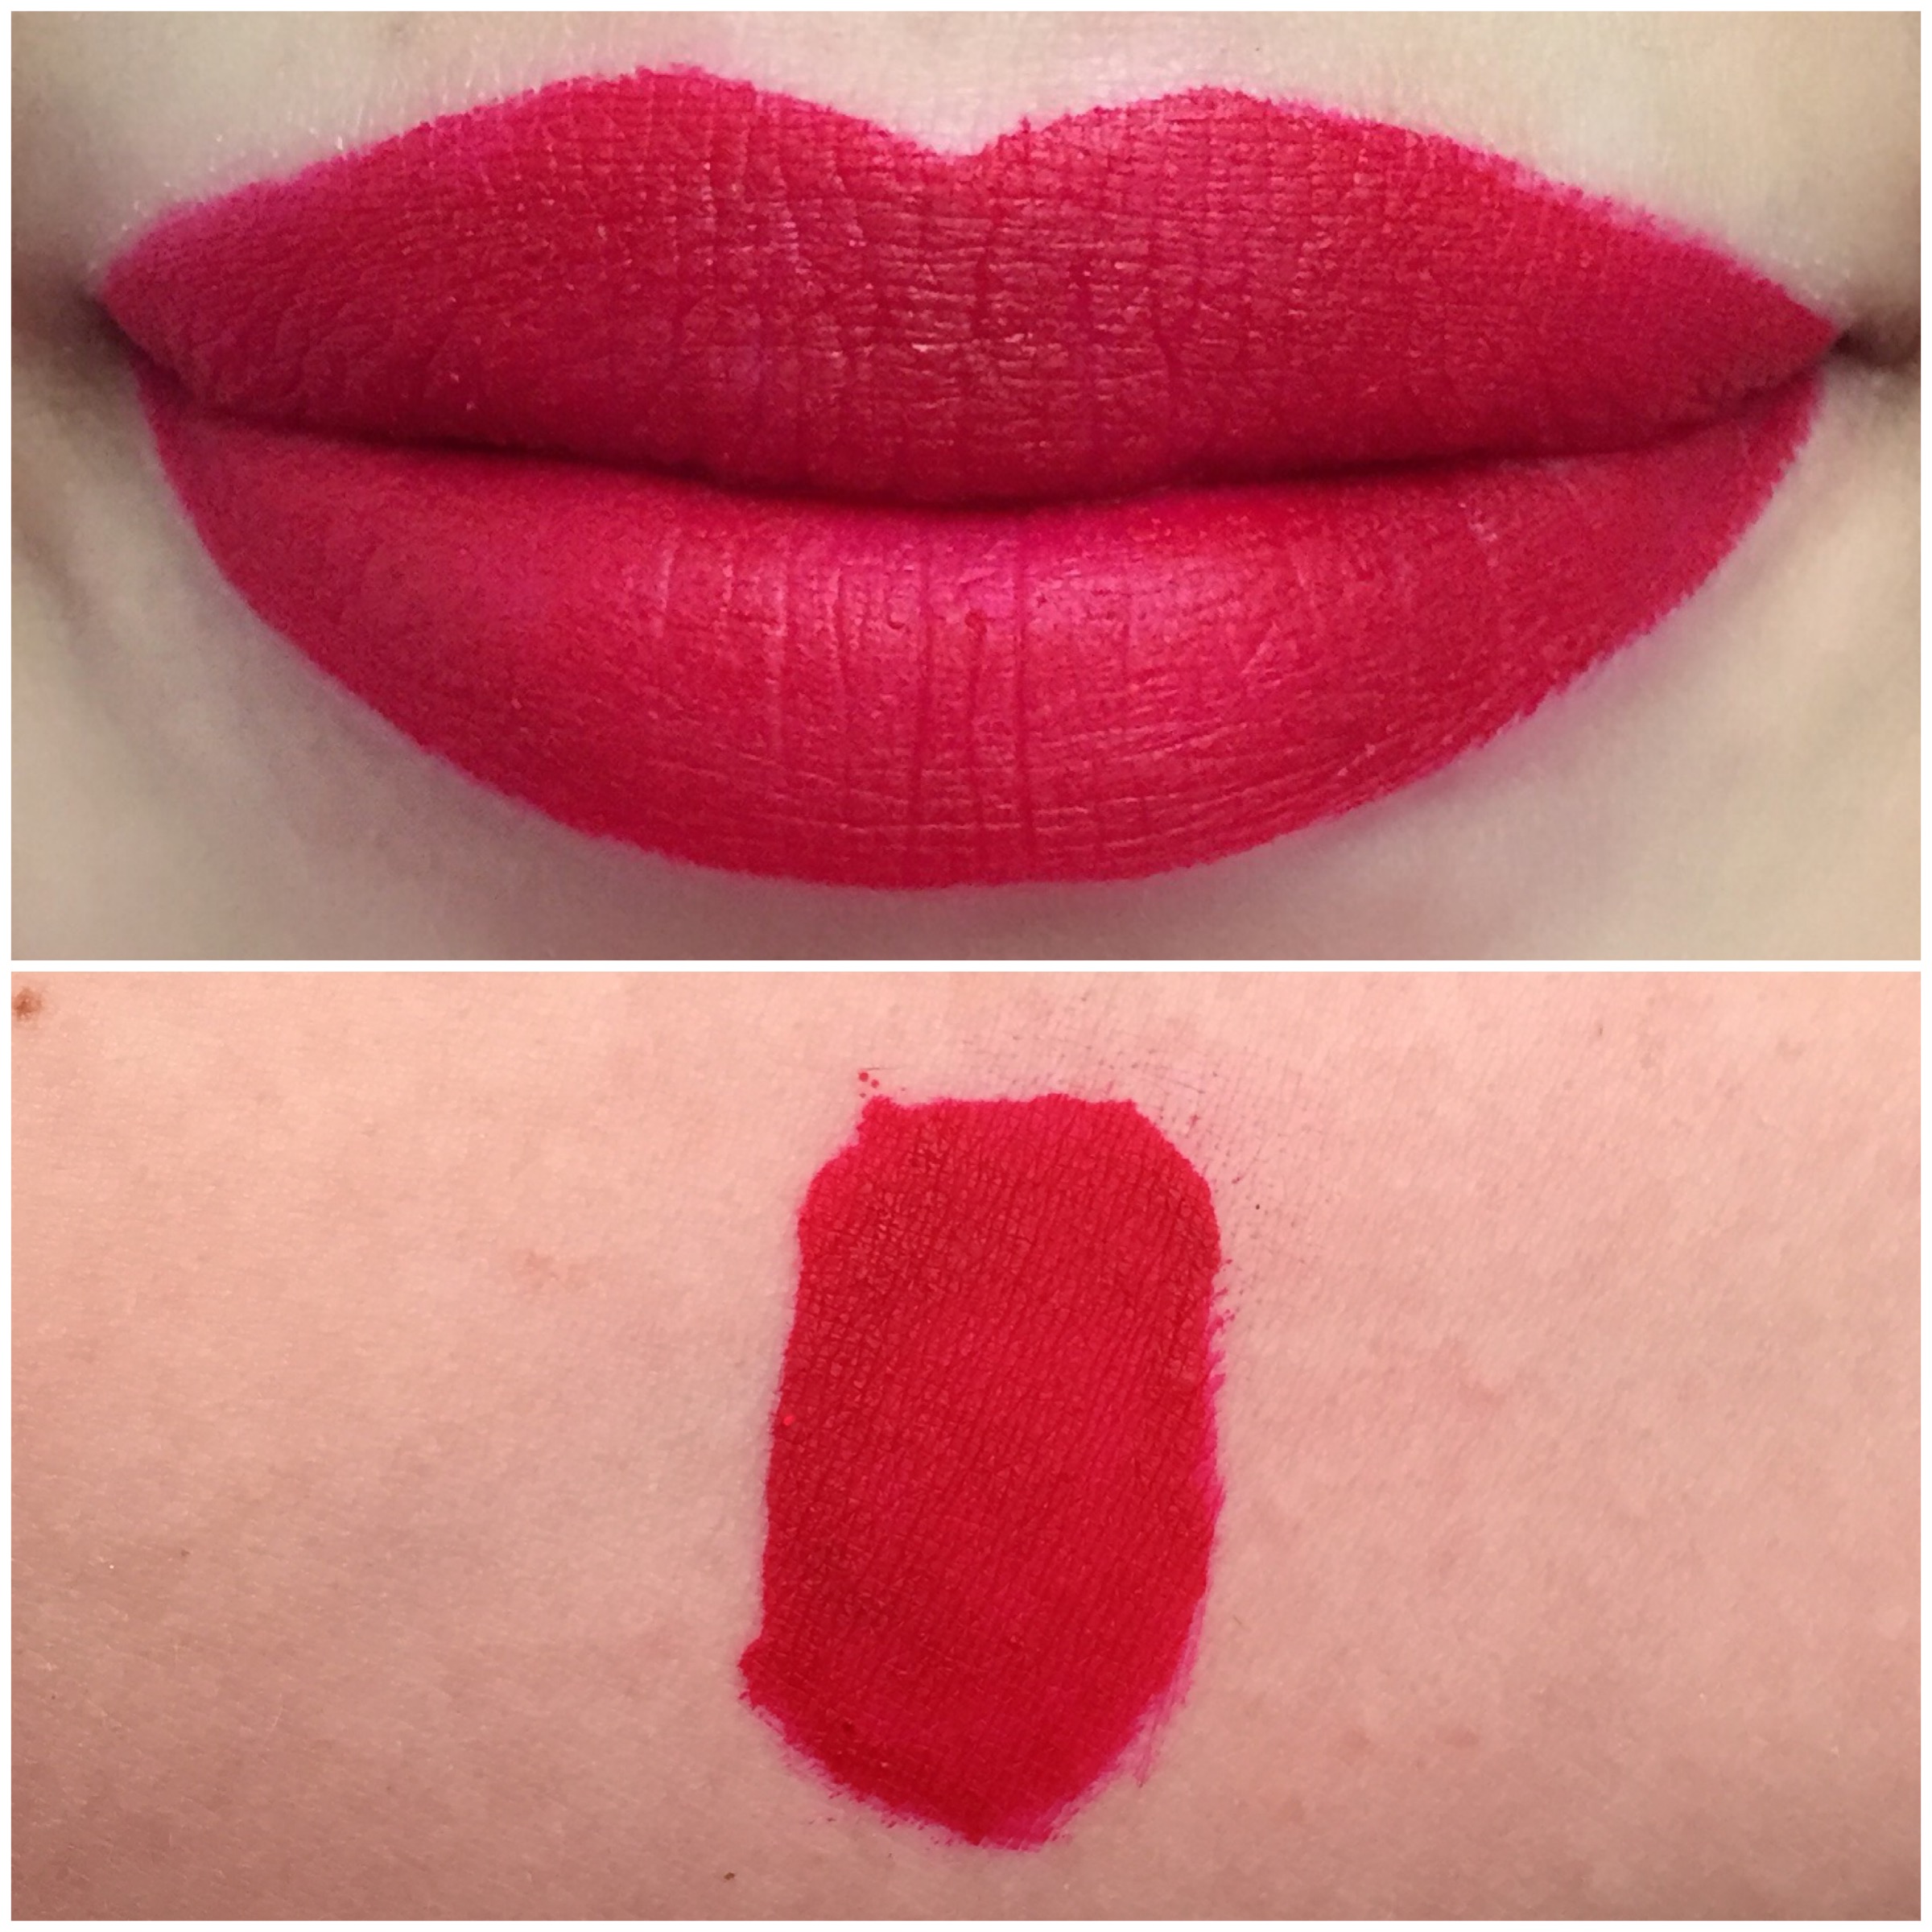
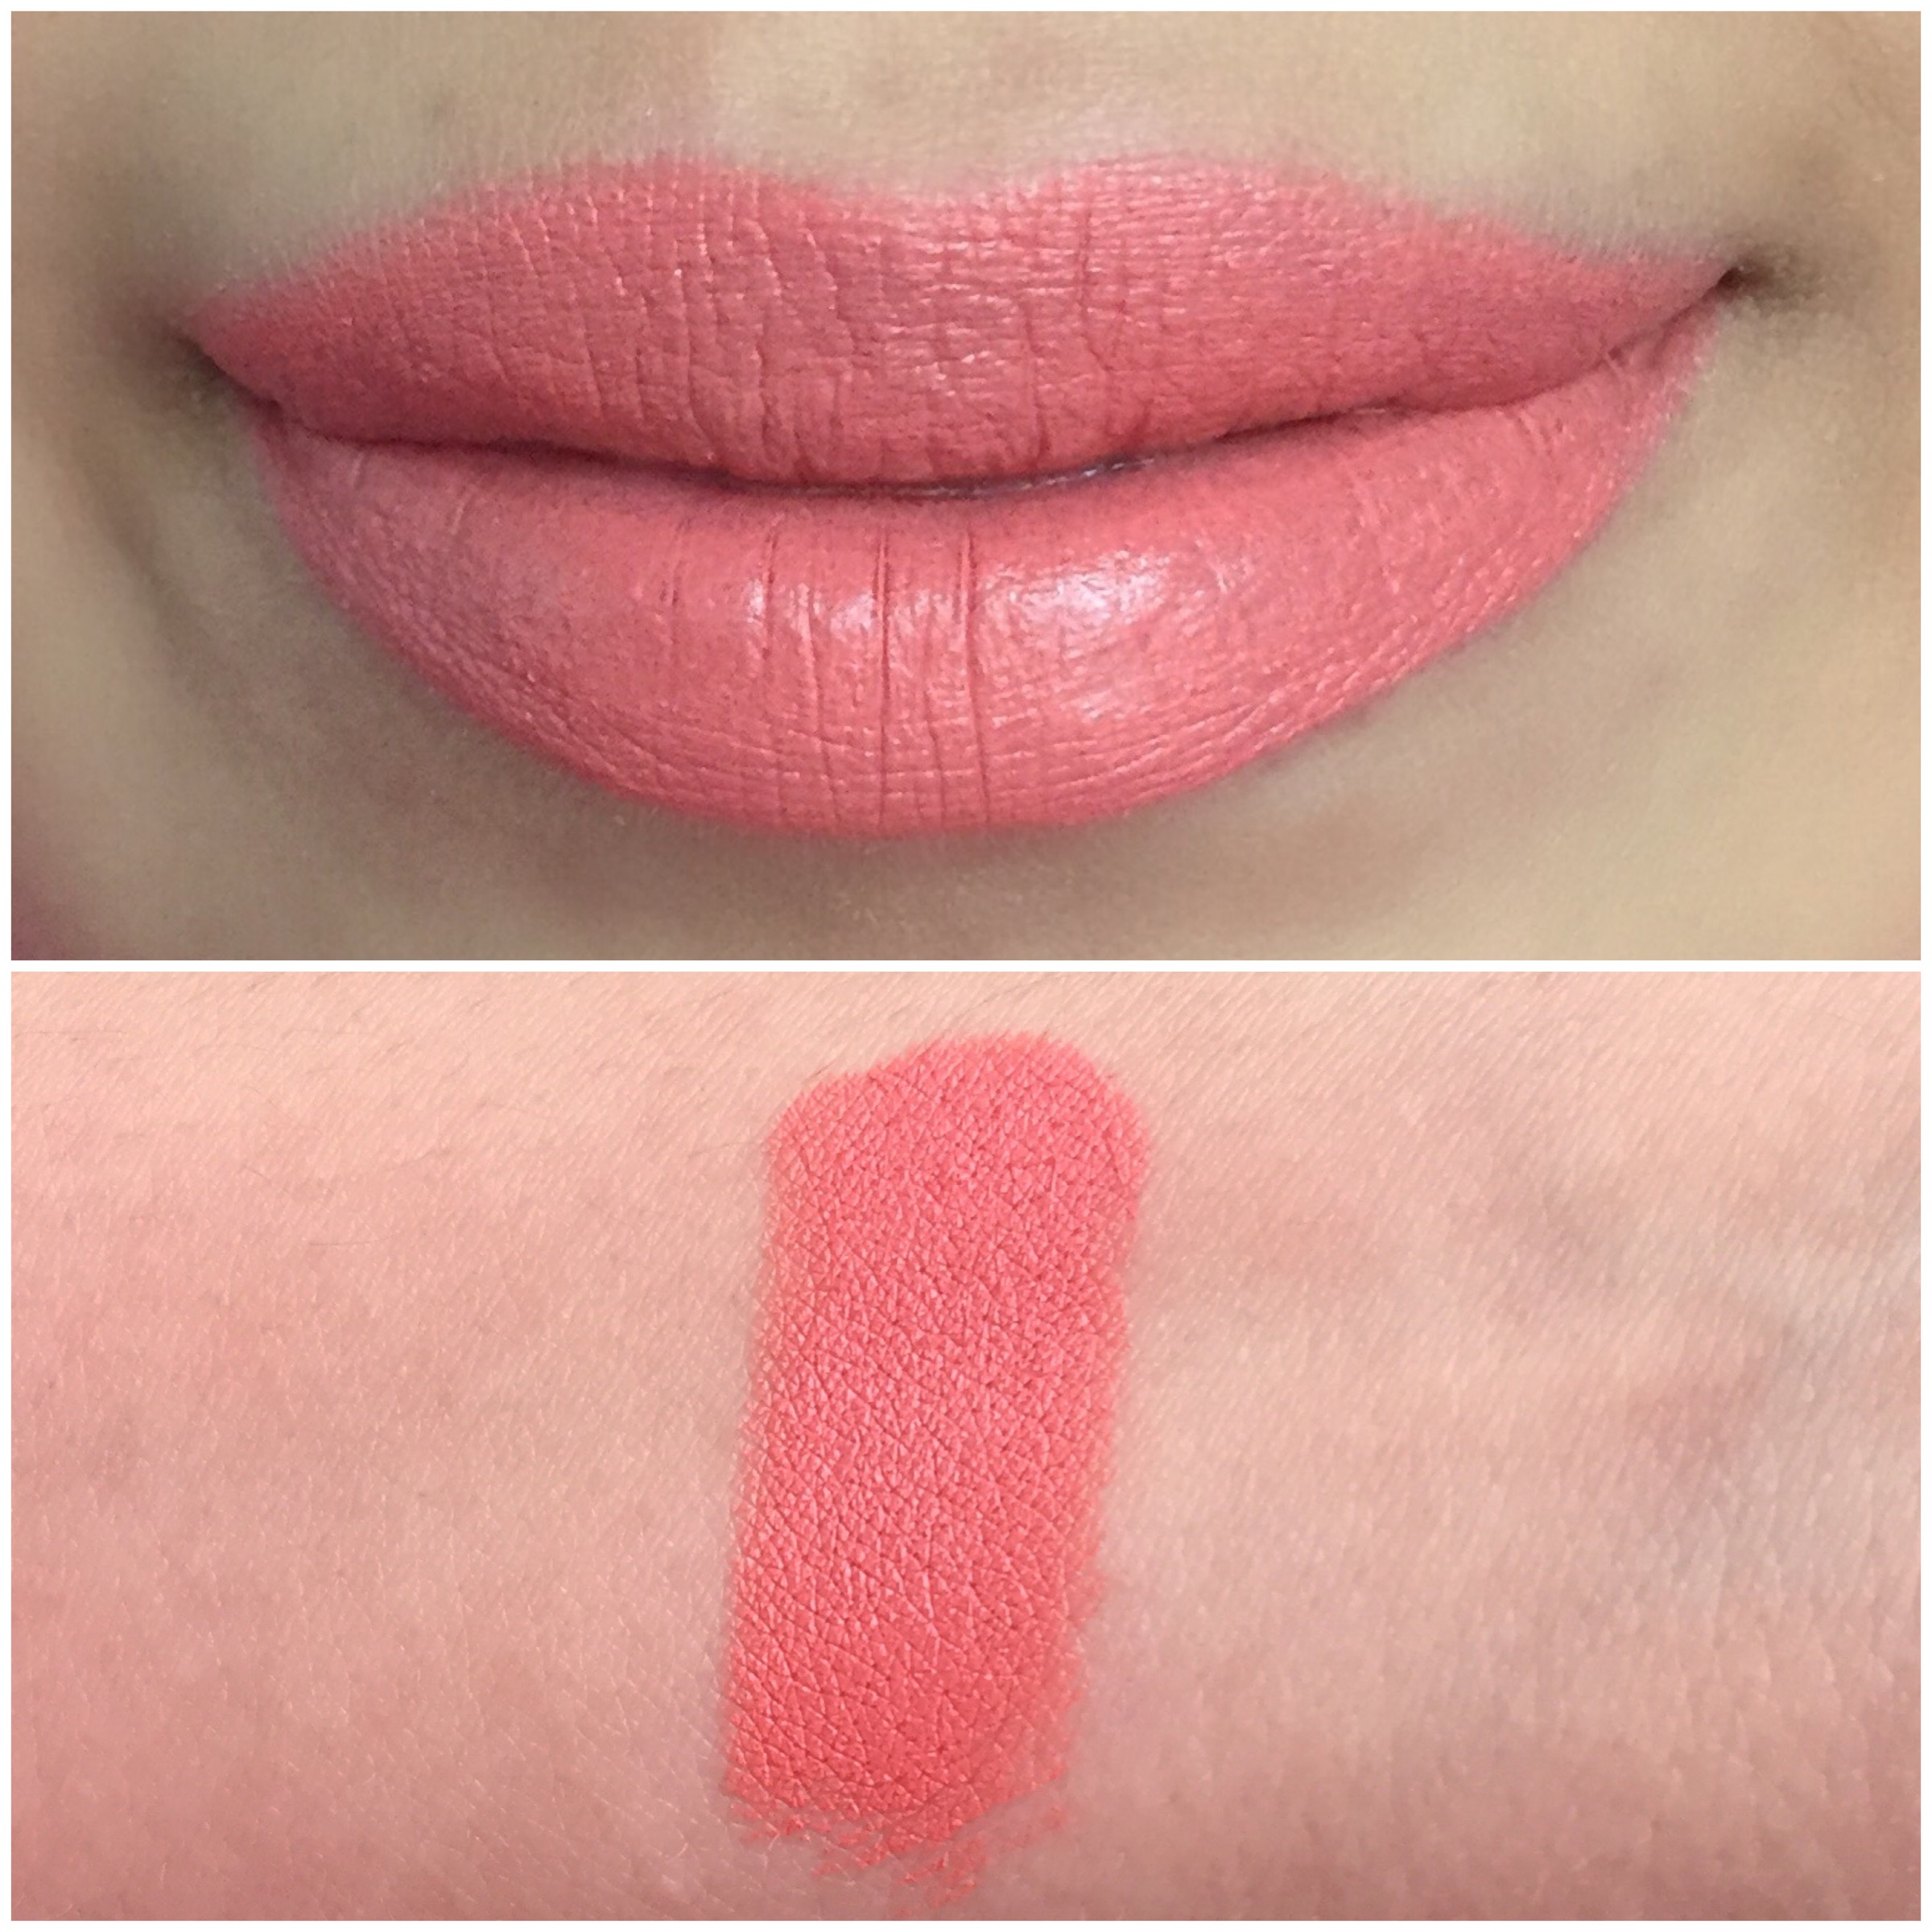
Most of you know I love Kat Von D Liquid Lipsticks. She recently came out with a Lolita Lip Duo. It includes a mini Lolita and a new shade Lolita II. You know I had to get my hands on this. Unfortunately it’s sold out online, but I would check in stores to see when it comes out. I believe the full size Lolita 2 should be out Dec/Jan.

IMG_1994

The formula of the Everlasting Liquid Lipsticks are better than ever! They are easier to apply and they are build-able. There aren’t very many liquid lipsticks out there that you can add layer after layer. They usually get all clumpy and flakey. I think I applied about 4 to 5 layers.
FullSizeRender
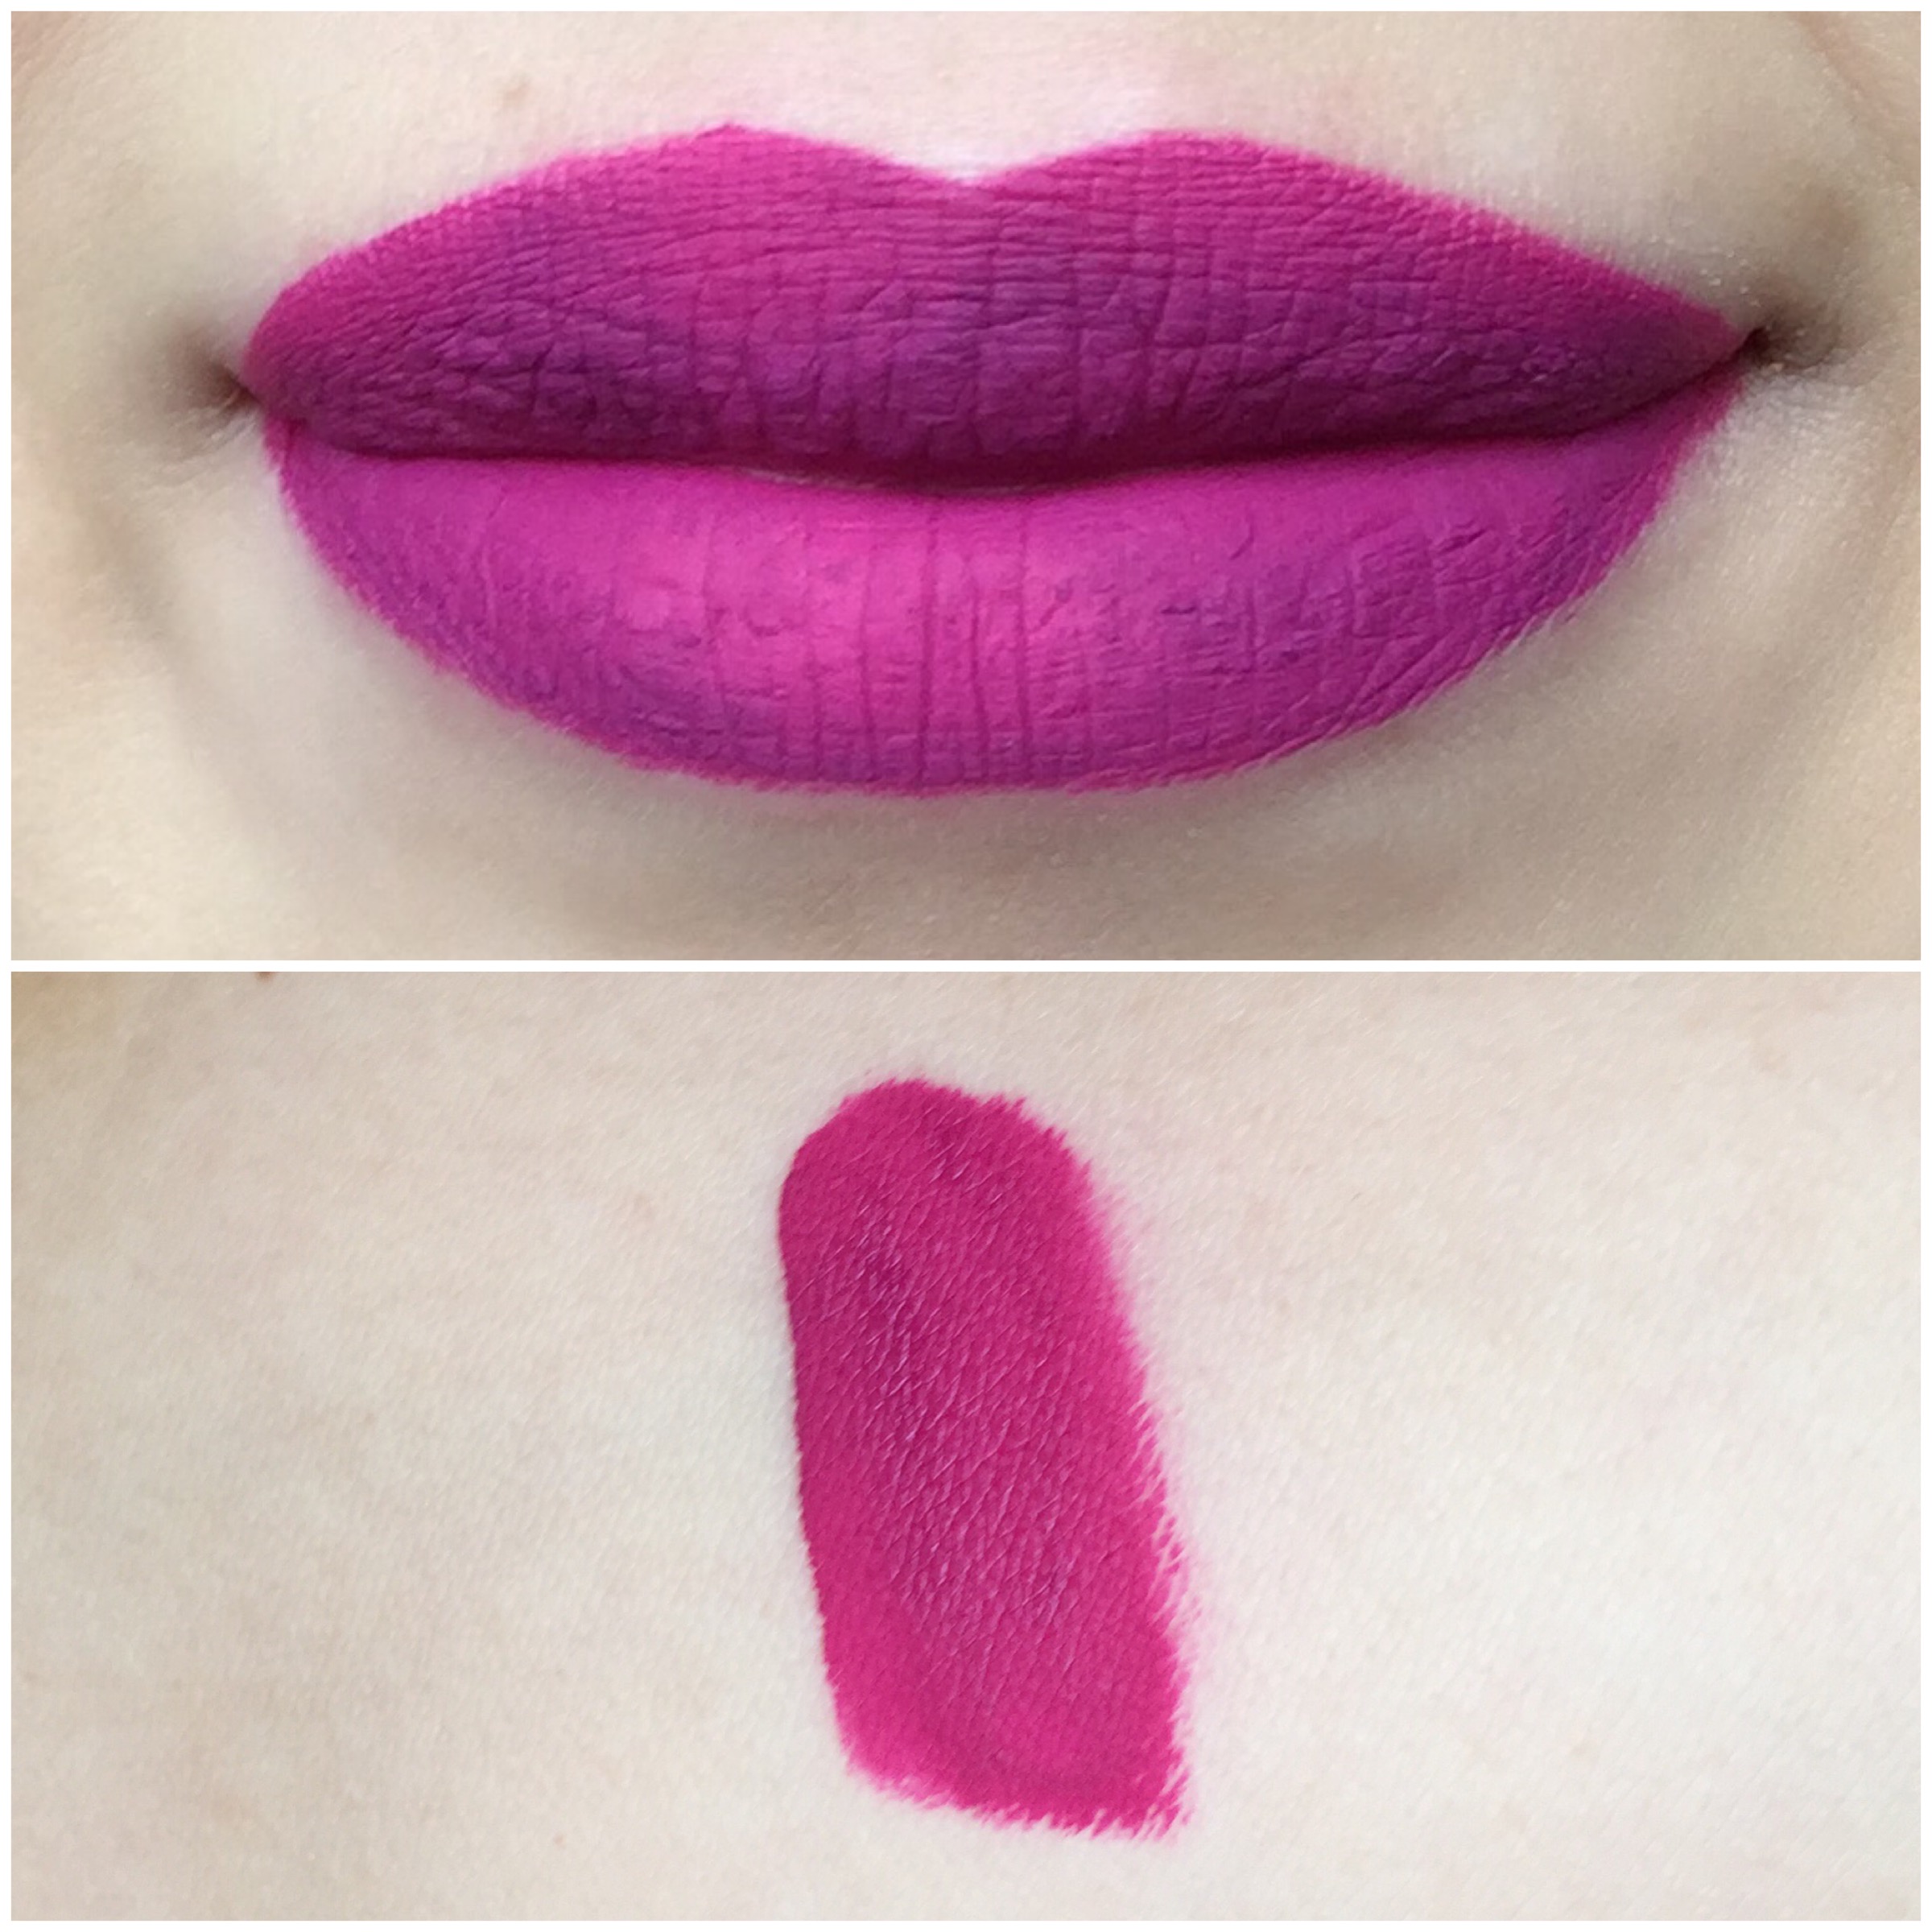
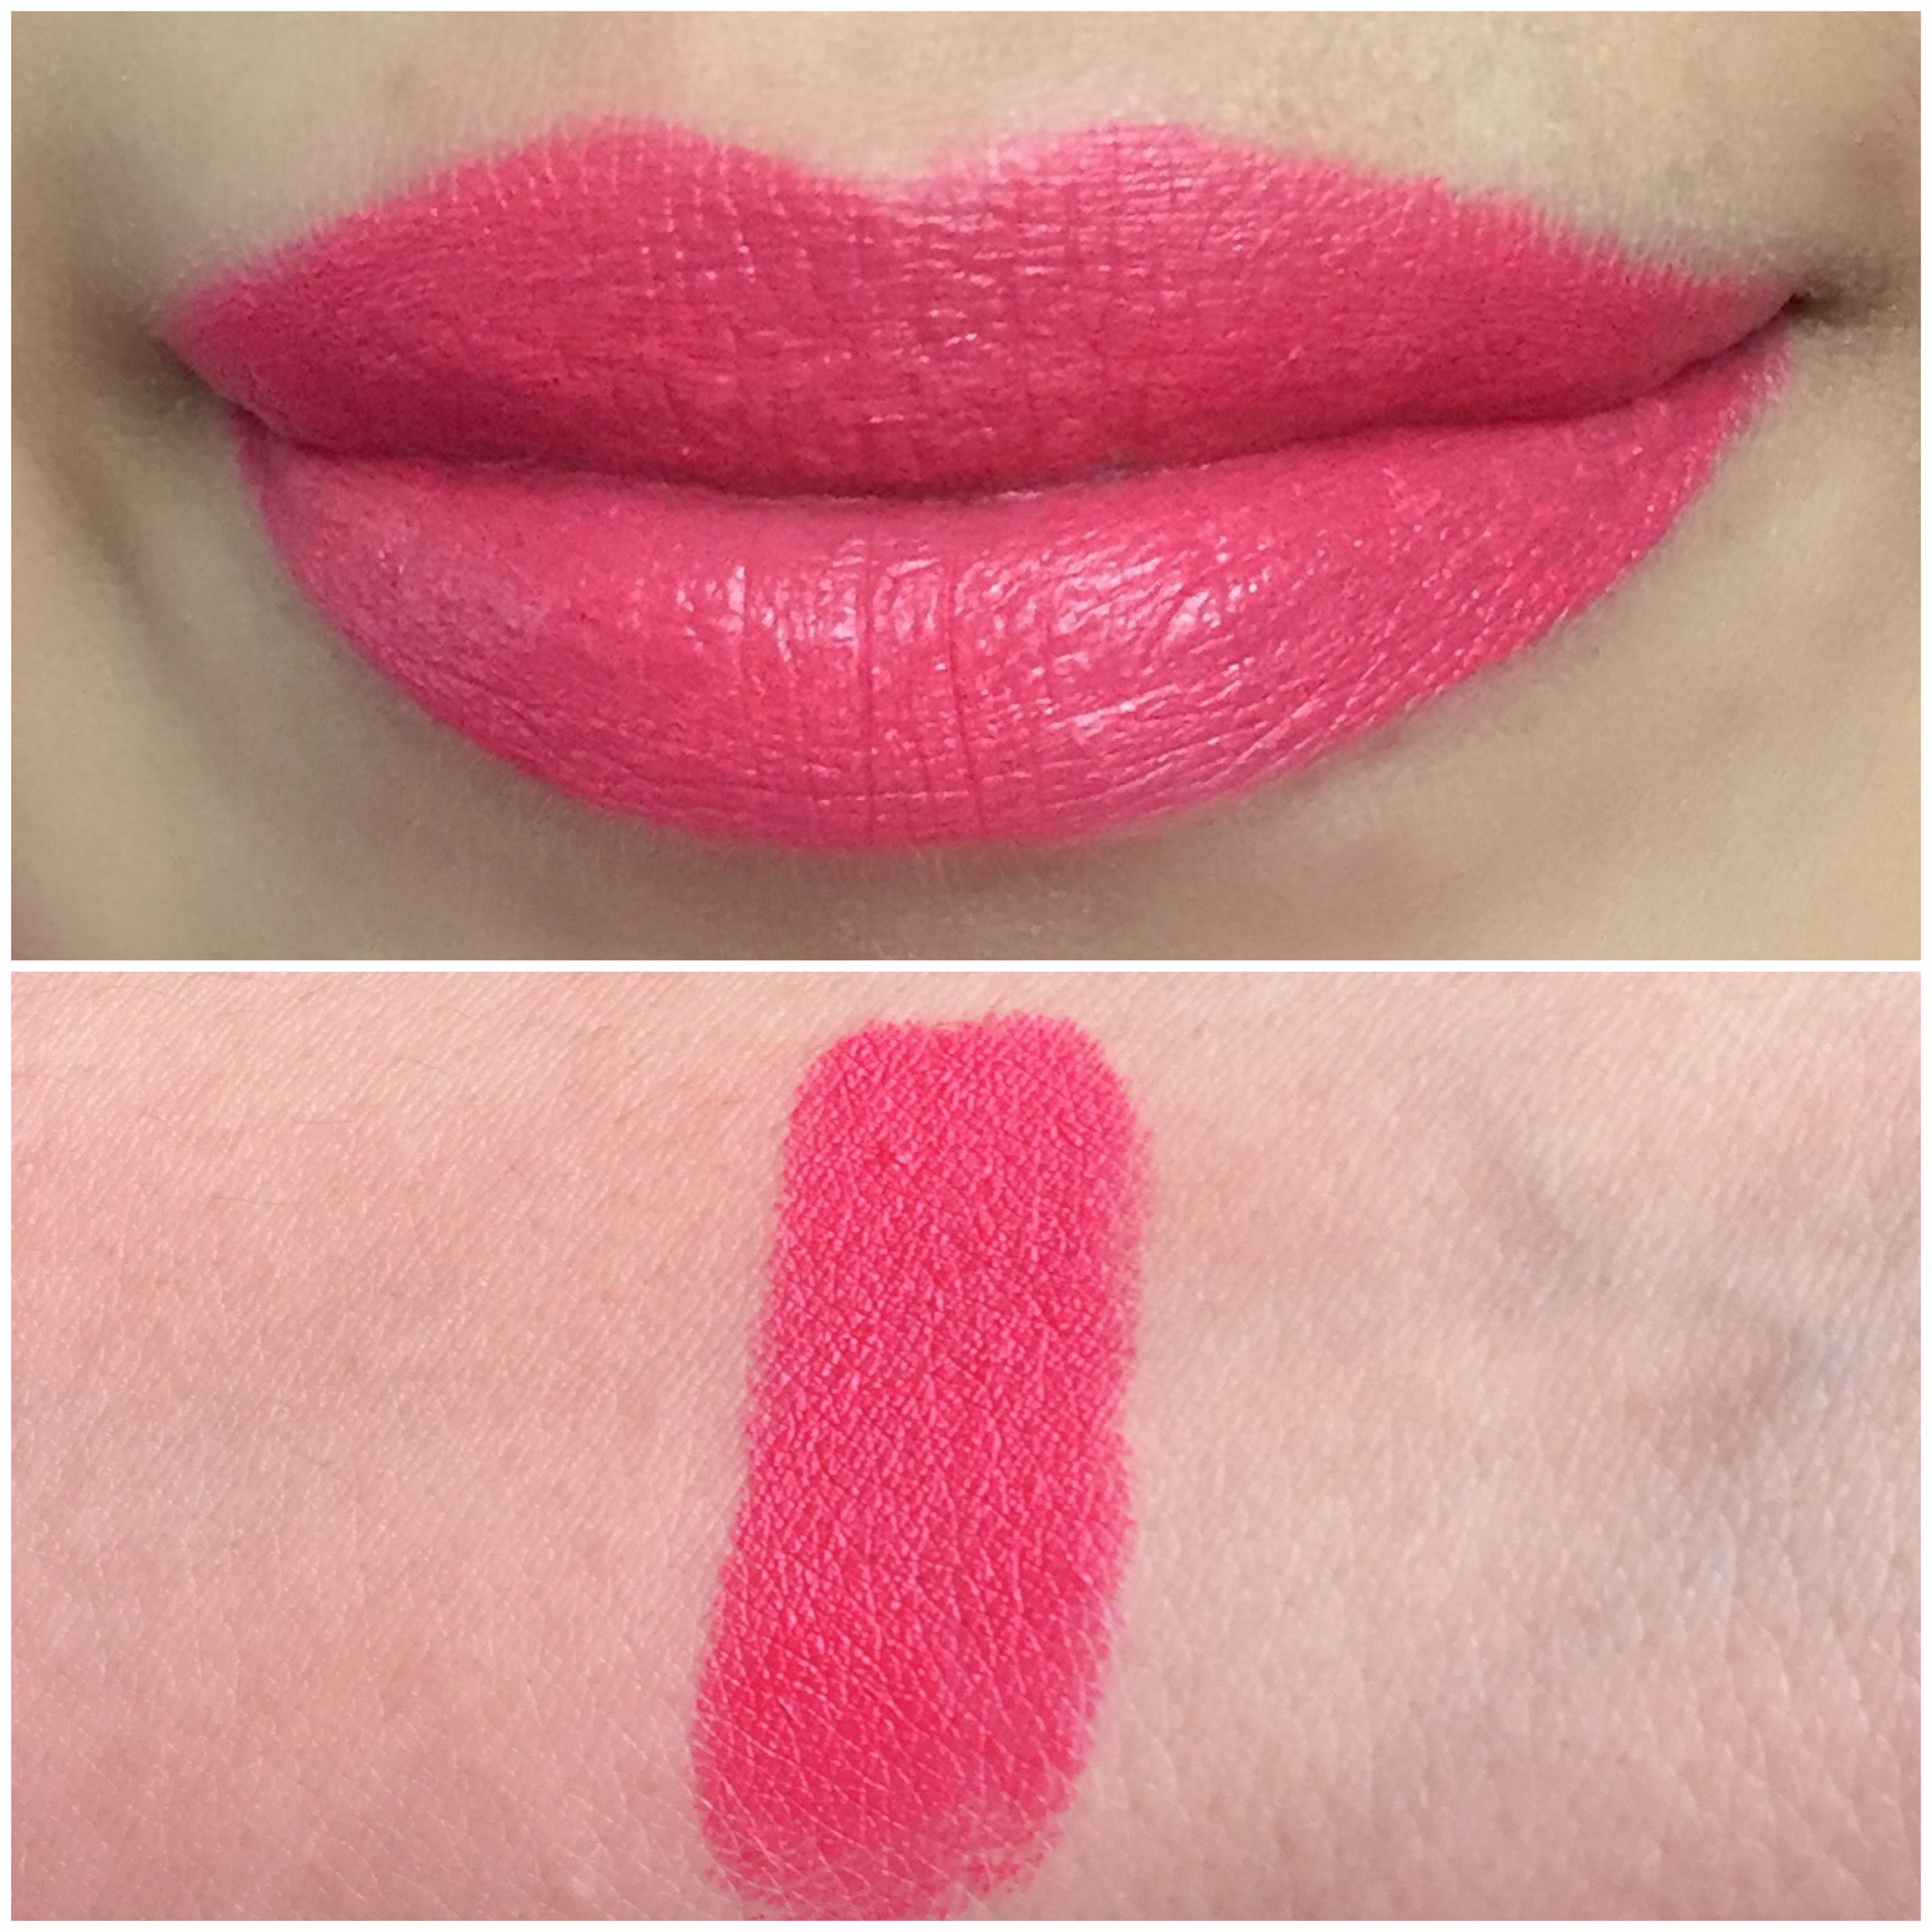
The OG Lolita is a brown pink nude shade and Lolita II is a peachy pink nude. I think Double Dare is pretty similar but it’s more pink. I really love Lolita II, it’s a great nude and I think it’ll look great on all skin types. I definitely recommend purchasing this duo, especially if you don’t already own Lolita. I did not wear a liner with it.

IMG_1936I will soon be doing a post to show you all what products and techniques I use for my flawless foundation routine.

Thanks for stopping by!

XO, Diana

Favorite Lipsticks for Fall 2015


I recently posted my favorite affordable lipsticks for Fall/Winter. If you didn’t get a chance to read it, you can check it out here. Of course I had to give you guys some higher end options. This was honestly very tough for me. I didn’t realize how many dark vampy colors I had, but I think the lipsticks I chose are great/different options. I apologize in advance for the lighting. These Seattle clouds do not give any natural lighting.

IMG_1710Dose of Colors Truffle ($18)- I’ve already mentioned this lipstick on my blog a couple of times. It’s a great nude with a mauve-y tint. My favorite part about this lipstick is not needing a lip liner.  You can check out my shade of the day post here.

IMG_1728Too Faced Melted Berry ($21)- This lipstick is a very pigmented berry fuchsia color. A little goes a long way with this lipstick. It does have somewhat of a glossy finish so I like to apply translucent powder over it. I purchased mine in a holiday set last year. Check out this year’s set at Sephora. You get four mini lipsticks (including berry) for $25.  I honestly think Melted Berry is worth purchasing alone.

IMG_1718NARS Audacious Lipstick in Audrey ($32)- I LOVE this lipstick. It’s so different and it’s not a color people tend to go with. Which is why I love it so much. It’s described as a red currant. It’s basically a muted red with a little bit of brown. I really like the Audacious line because every color is extremely pigmented.

IMG_1735YSL Rouge Pur Couture The Mats Lipstick in 206 ($36)- I’m not that big of a fan of brown lipsticks but this one is doable. It’s a very pretty matte red brown. It’s very creamy and not drying at all. The formula is very similar to the NAR Audacious. It also has that wonderful YSL smell to it.

IMG_1749Kat Von D Liquid Lipstick in Noseferatu ($20)- I think everyone needs a medium-dark red lipstick and this is it! I have been loving this lipstick with the NARS Velvet Lip Liner in Lanikai.

IMG_1744NARS Velvet Matte Lip Pencil in Train Bleu ($26)- is a deep deep purple. Very similar to NYX Transylvania but this one is 10 times better. It’s a lot easier to apply and more pigmented. I also love the shade Damned. It’s more of a berry red.

I did not use a lip liner or primer for any of these. I wanted you guys to see the true color. I can’t believe I was able to narrow my choices down to 6. I know there are tons of options out there, so I hope these are different to what you have seen so far. For the lipsticks I didn’t include, I will be posting in future shade’s of the day.

Thanks for stopping by!

XO, Diana

Shade of the Day- Santa Sangre

Today’s shade of the day features one of the new Kat Von D Everlasting liquid lipsticks. Santa Sangre is described as a “poison apple.” It’s a beautiful bright red! This one is a must have. You can never have enough red lipsticks. And the formula in this is better than ever. It’s not drying and feels very comfortable.

Shade of the Day- Bachelorette

IMG_2268

TGIF!

Today’s Shade of the Day is another Kat Von D Liquid Lipstick. It’s in the shade called Bachelorette. This color is described as a “dark reddish fuchsia.” It’s a vibrant hot pink with a red undertone. I love to wear this when I’m not in the mood to wear a bright pink or a red. It’s a perfect in between color.

Left- Bachelorette, Right- All Fired Up

Left- Bachelorette, Right- All Fired Up

I first applied my usual Make Up For Ever Lip Line Perfector. This is my go-to lip pencil when it comes to liquid lipsticks. If your not a fan of liquid lipsticks, a good alternative is MAC All Fired up. Bachelorette is slightly darker.

IMG_2269

Foundation: Dior Skin Nude Air,  UD Naked Skin Concealer, Kat Von D Shade + Light Palette

Bronzer: Hourglass Ambient Bronzer in Radiant Bronze

Highlight: Laura Mercier

Eyes: KVD Shade + Light Eye, MUG Foiled Eyeshadow in Grandstand, KVD Tattoo Liner, ABH Brow Wiz

I’m off to explore downtown Seattle with my husband and little brother and sister.

Happy weekend!

-Diana

Shade of the Day- L.U.V.

IMG_2117

All makeup worn is featured in May’s Makeup of the Month.

Today’s post features Kat Von D Everlasting Liquid lipstick in L.U.V. ($20). I mentioned this item in my previous post. It is a bright violet with a slight cool undertone. These liquid lipsticks are extra matte and and last all day.

IMG_2122

A lip liner isn’t really necessary but I lightly lined my lips with MAC’s Lip Pencil in Magenta. NARS Audacious lipstick in Angela is a lot lighter. I’d say MAC Heroine is similar as well but I don’t own it.

FullSizeRender-2

MAC- Heroine, LUV, NARS- Angela

IMG_2113Here’s a picture of yesterday’s OOTD as well!

Top- TJ Maxx

Jeans- JCPenny

Shoes- Converse

Necklace- Baublebar (old)

Bag- Marc by Marc Jacobs 

Happy Saturday!

-Diana

Makeup of the Month- May 2015

I can’t believe it’s almost been a month since I have posted! A lot of things have been going on and I have been traveling like crazy but I’m glad to be back. I decided instead of doing monthly favorites, I’m just going to show the makeup I’ve worn for the month. I usually try to change my makeup routine every month anyways. Some of the makeup will be repetitive but hey, that just means I really like it!

IMG_2100

Nars Blush in Madly I mentioned this blush last month and I am still using it.

Tarte Bamboo Foundation Brush– I seriously LOVE this brush! Its so big and soft. It makes applying foundation so effortless and creates an airbrush finish.

Urban Decay Naked Skin Concealer– I really have been enjoying this concealer, maybe even a bit more than the NARS Creamy Concealer. I like this concealer because I don’t have to set it with powder. It does a great job setting itself without creasing. It’s not as full coverage as my MAC Pro Longwear so it’s perfect for everyday use.

Rimmel ScandalEyes Waterproof Kohl Liner– This continues to be my everyday liner for the waterline. Love it!

Anastasia Beverly Hills Brow Wiz– Favorite brow product for the last couple of months. I have the color Medium Brown.

Dior Nude Air Serum Foundation– I love this foundation. It’s very lightweight yet it gives a good medium coverage. I have normal skin with a few dry patches. This one doesn’t cling on my dry patches like other serum foundations I have tried. It has a semi powdery/velvet finish so I don’t have to apply setting powder. Because it is a serum I’m not sure it would be good for oily skin. I’d recommend setting it with powder to keep it from sliding off your face. I have the shade 030 Medium Beige.

Clinique Bottom Lash Mascara– This little guy is amazing. I can wear any mascara on my top lashes and this mascara will keep me from having raccoon eyes at the end of the day.

Maybelline Falsies Mascara– This mascara gives my top lashes great volume.

Make Up For Ever Pro Sculpting Duo in No. 2– I also mentioned this product last month. It was only for the highlight but I have actually been using the bronzer side this month. It can be a bit too orange so to keep me from looking like an Oompa Loompa, I lightly buff it into my cheeks. I would definitely repurchase just for the highlight.

Marc Jacobs Precision Pen Waterproof Eyeliner– I received this in a Marc Jacobs 500 point perk. It works just as good as the KVD Tattoo Liner ($19) and the Stila Stay All Day Liner ($20). This item is $30 for a full size. Since the other two work just as good (or even better) I won’t be purchasing this.

Kat Von D Everlasting Liquid Lipstick in L.U.V.– I purchased this a couple of weeks ago and I’ve worn it twice. It’s described as a “rich violet” and I totally agree. I didn’t take any pictures the days I wore this so I’m thinking about doing a Shade of the Day featuring it. I was very intimidated by this color for the longest time because I thought it would be too bright. I’m glad I finally made the purchase because I really like it.

Check out my favorites from last month. I’ve been in Texas for the last 10 days and I fly back to Seattle tomorrow night. I’m actually looking forward to the weather in Seattle because it’s been raining like CRAZY in Texas!

Happy Friday!

Favorite Lipsticks for Spring- 2015 

IMG_1376

L to R: Kat Von D- Bauhau5, MAC- Impassioned, Dose of Colors-Kiss of Fire, MUFE- 39, Sephora Collection- African Violet

After digging through my lipsticks I have compiled a handful I think would be perfect for spring. Don’t get me wrong I am a firm believer of wearing whatever I want whenever I want, but these are just colors I tend to go for this time of the year.

IMG_1451

Kat Von D- Everlasting Liquid Lipstick in Bauhau5 ($20)

This color is described as a “deep raspberry.” It’s very bright so it’s a perfect winter to spring transition color. I would recommend wearing a liner for an even application.

IMG_1422

MAC Cosmetics- Impassioned  ($16)

This is a perfect pinky-coral color!

IMG_1421

worst swatch ever -__-

Dose of Colors- Kiss of Fire ($18)

I love this color because of how bright it is. My favorite red lipsticks are ones with a pink tint to them.

IMG_1423

Make Up For Ever- Rouge Artist Intense in # 39 ($20)

This is my favorite peach lipstick. I also have MAC’s Ravishing but I prefer this one.

IMG_1424

Sephora Collection- Cream Lip Stain in African Violet 

I LOVE this color. It’s perfect. You need it. Go get it! You can check out my post on it here.

There are a lot more lipsticks I could have chosen but I wanted to pick basic colors you would wear for spring, coral, peach, violet, etc. Like I said before you can wear these colors anytime of the year. I just wanted to give you some ideas for new lipsticks. I hope this helped!

Happy Friday! I will be heading to Cancun for a much needed vacation. 🙂

-Diana

Kat Von D Shade + Light Contour Palette Review

IMG_1211

I purchased this palette about a month ago so I’ve had enough time to play with it. Contour palettes have become pretty popular since the Anastasia Beverly Hills one came out. Now there are tons of brands to choose from. This palette contains 3 shades for highlighting and 3 shades for contouring. It comes with a mixture of warm and cool tones. I like that there is more product in dark shades. The packaging is a bit thick, but you get a great quality mirror.

IMG_1296

Lucid, Lyric, Levitation

Let’s start off with highlight colors. Lucid is a light pink powder, Lyric has a yellow undertone, and Levitation is a soft peach color. I personally could not use any of these to set my concealer because my undereye area is too dry. When I set my concealer I like to use a translucent powder like the NARS Loose Setting Powder. It did work well to highlight my cheekbones, chin, and forehead. These also worked great to highlight my brow-bone and set my eye primer.

Sombre, Shadowplay, Subconscious

Sombre, Shadowplay, Subconscious

Sombre is a true taupe color, which is an idealFullSizeRender-1 
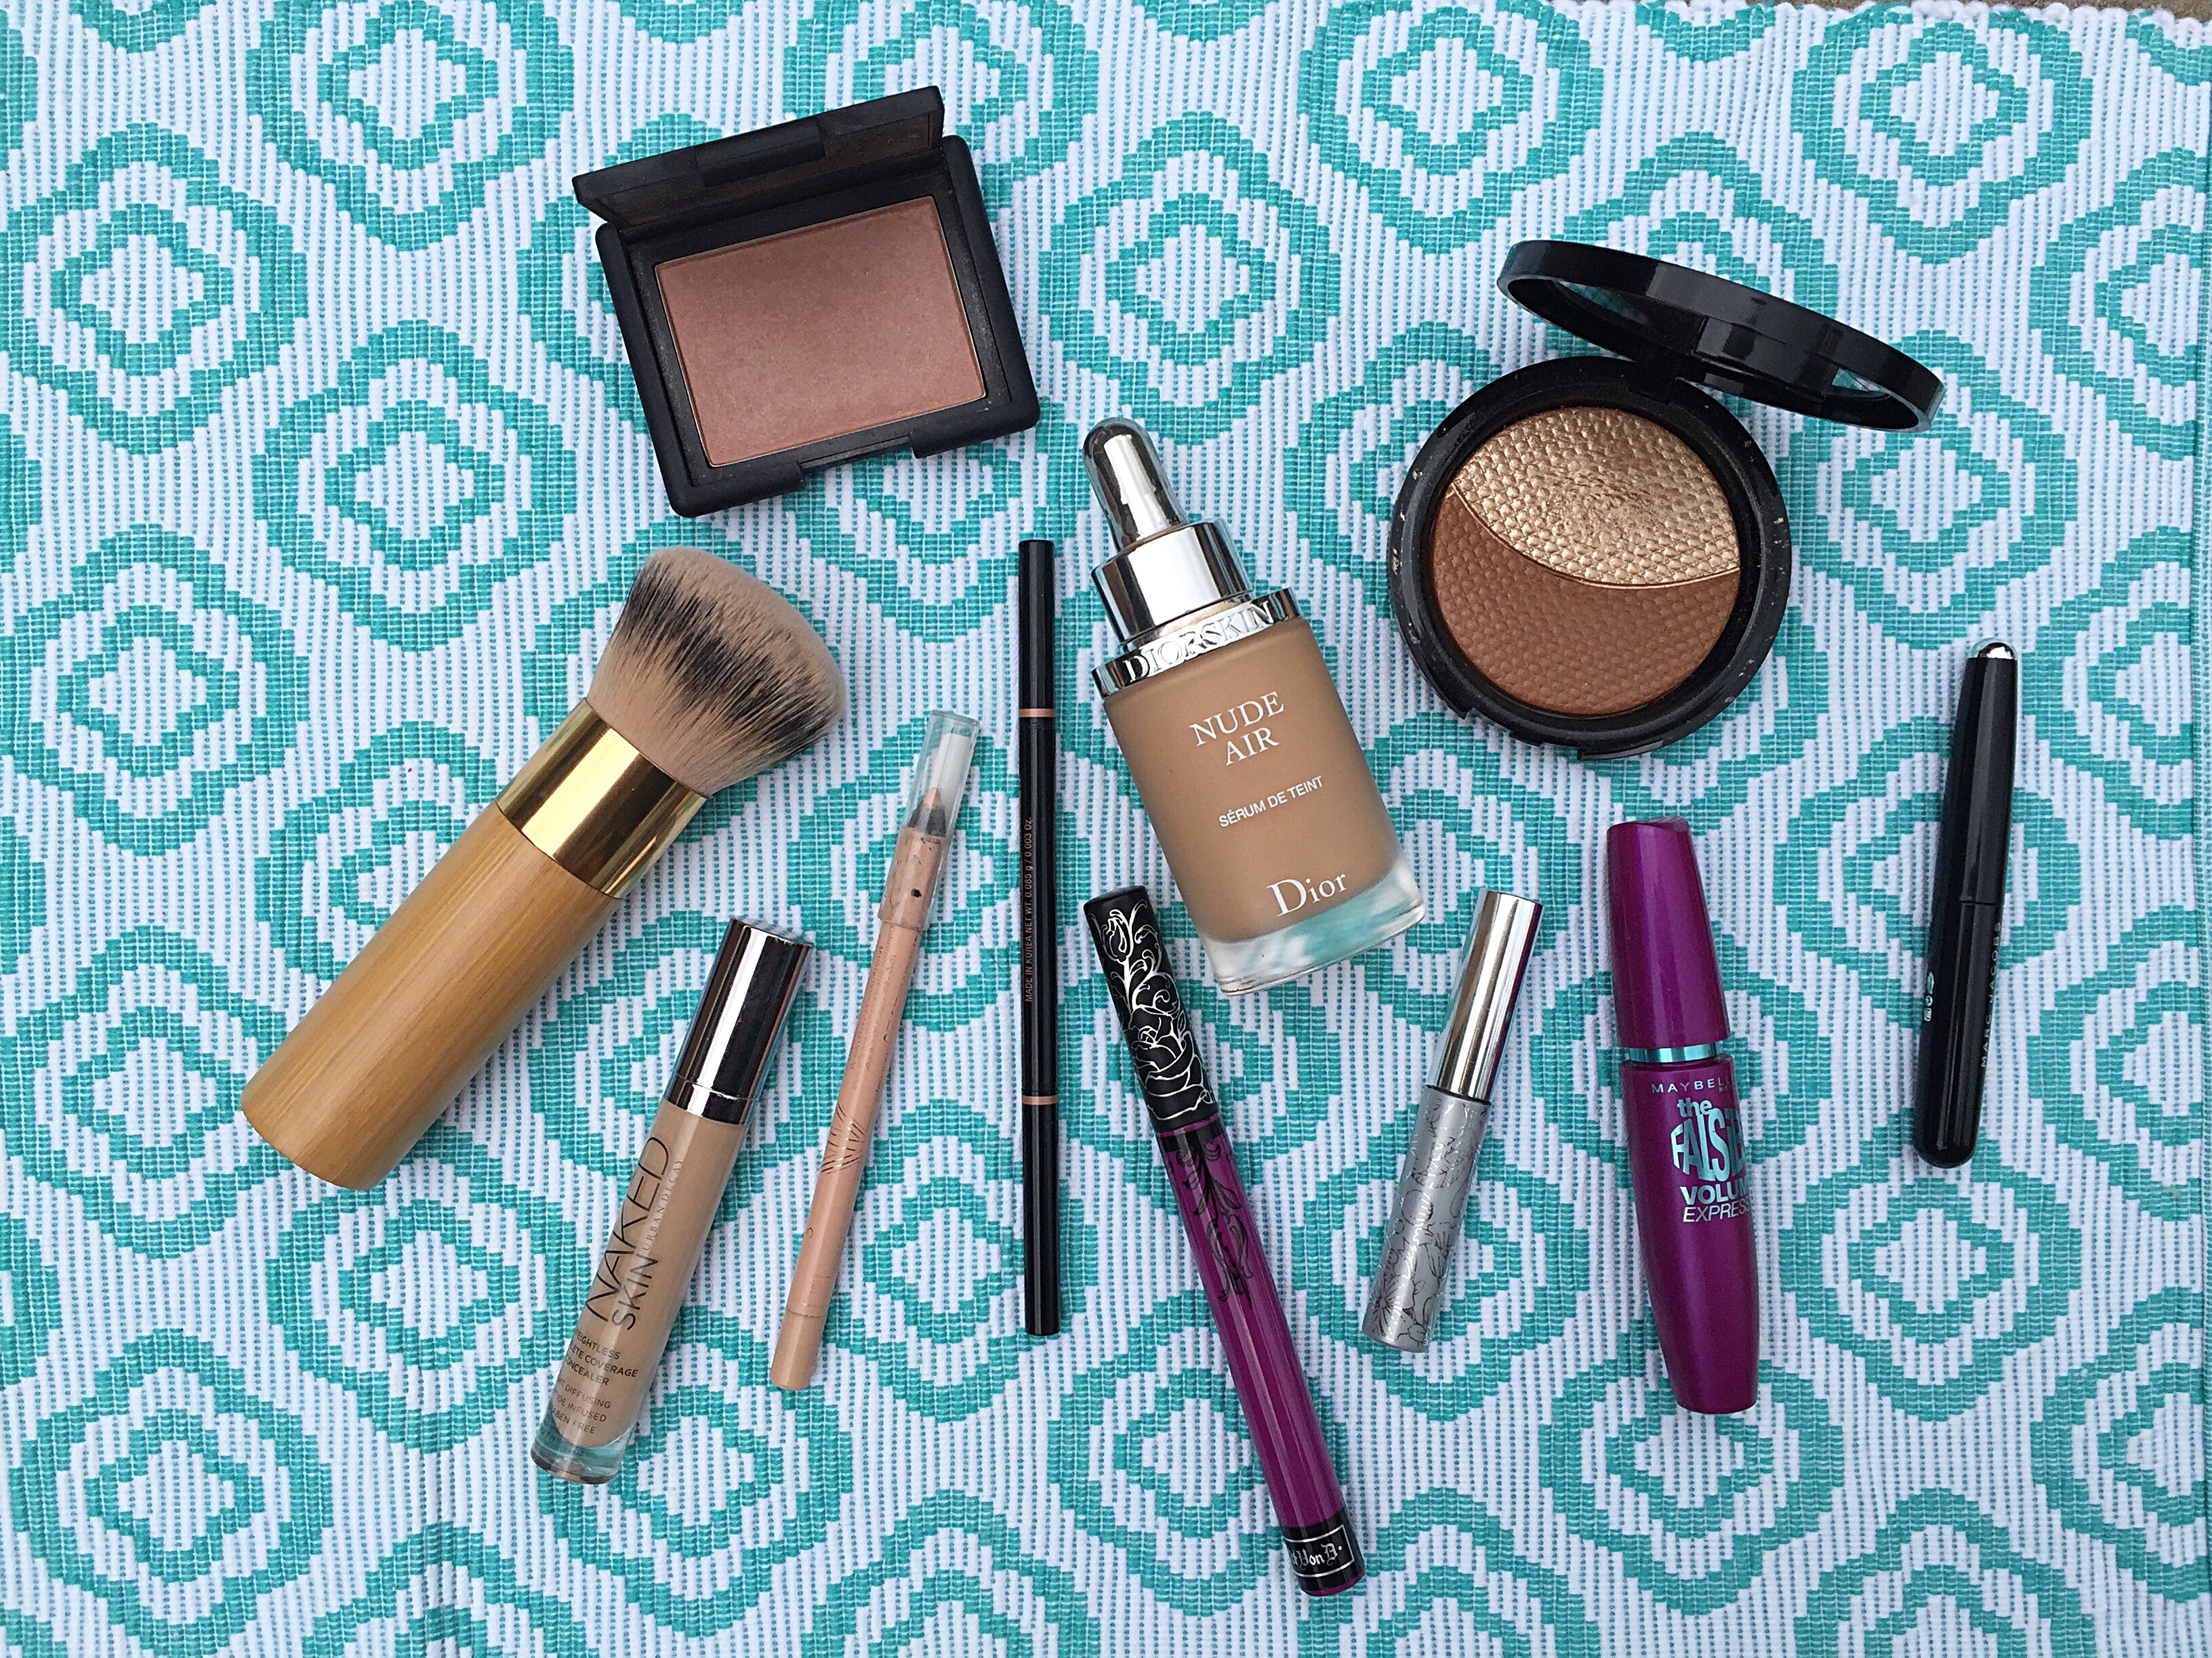
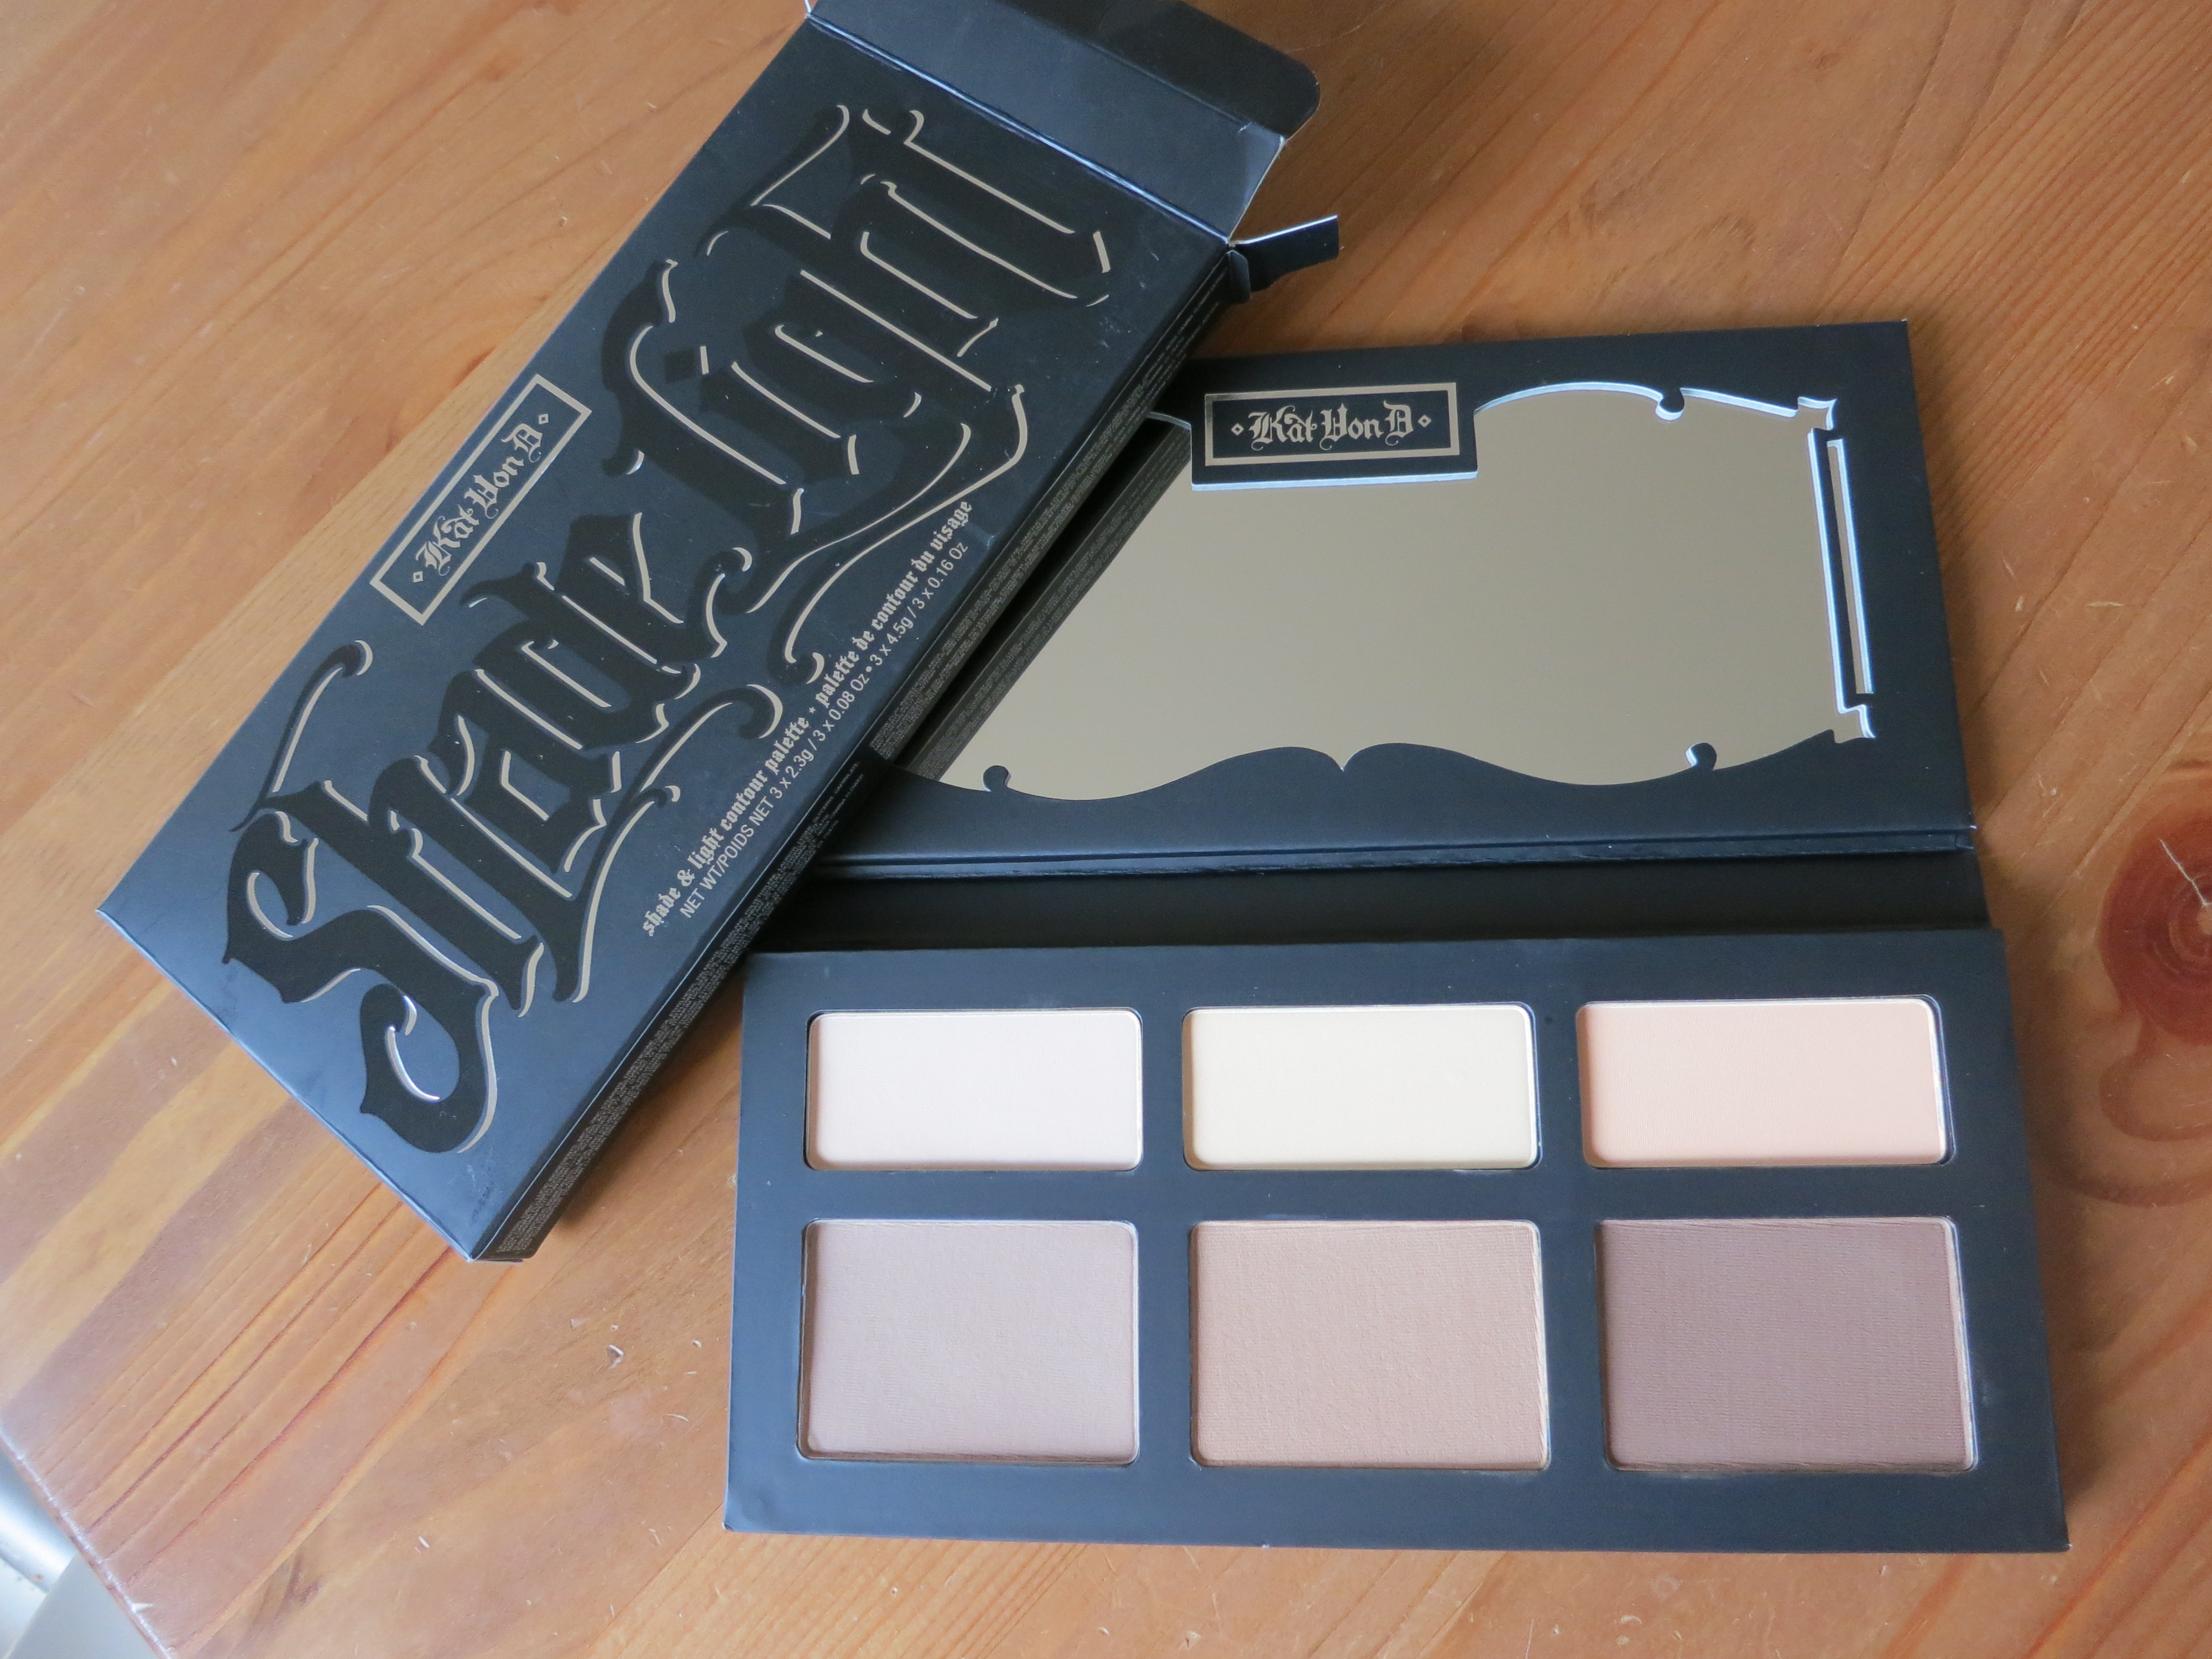
contour color. Shadowplay is a soft warm brown color perfect for bronzing. Lastly, Subconscious is a deep brown. The colors I used the most were Sombre and Shadowplay. Subconscious could be used for a more sculpted look. This color is also perfect for those with deeper skin tones. If you look at the picture on the left you can see a very subtle contour (with Sombre), blended out with Shadowplay.
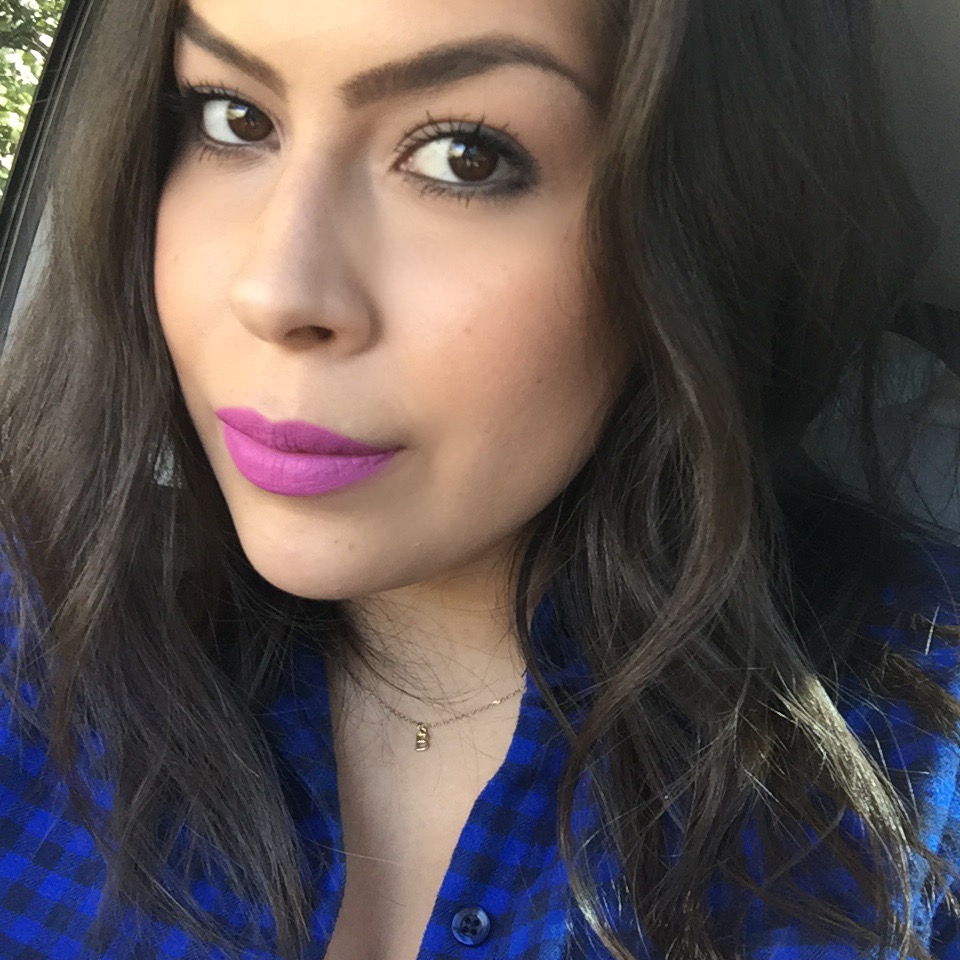
IMG_0519

Also used Sombre and Shadowplay on cheeks

All of the shades are super creamy and VERY easy to blend. I was pretty amazed at how fast and beautifully these blended together. It’s perfect for a beginner because the application is so effortless. These powders also work great as eyeshadows! I have used every single color as an eyeshadow and they all worked great. I used all 3 contour shades to create a soft daytime smokey eye (picture on right). First, I put Shadowplay in crease and Sombre all over eyelid. I then used a black liner on the top and bottom lash line and blended it out with Subconscious. I used a fluffy eyeshadow brush (Sigma E40) to blend it all together.

Overall this palette is great. The shades are a bit powdery, but they blend out like a dream. If I were to be asked which contour palette I preferred, I would easily pick this one. The only negative for me personally are all of the highlight colors because I don’t really need them. Like I said before I don’t really like using yellow or pink powders to set my concealer, but I think these would be great to set a full coverage concealer like the MAC Pro Longwear Concealer. Don’t forget you can use these as eyeshadows too! This palette is truly perfect for anyone! It can be purchased at Sephora for $46.

What’s your favorite product to contour with?

-Diana