Hello beauties! I’ve been asked a few times what products I use to achieve a flawless face. In this post I’m going to show you all of the products I use including the most important tools.
Step 1: Moisturize and Prime
I’ve been using the Belief True Cream Moisturizing Bomb (rewards), Origins Ginzing Eye Cream, and the YSL Blur Primer (deluxe sample). I apply the primer in the center of my face and around my mouth.
Step 2: Apply Foundation and Concealer
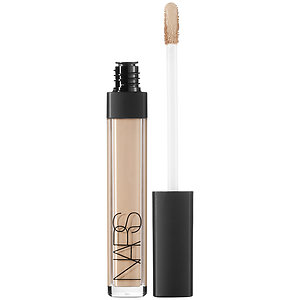
 I am currently using the Too Faced Born This Way Foundation and the NARS Radiant Creamy Concealer. My foundation is in the shade Natural Beige and my concealer is in the shade Custard. The concealer is about one shade lighter than my skin tone. I normally use the UD Naked Concealer, but my under eyes are a little to dry for that one right now. I also love using the MAC Pro Longwear Concealer.
The most important tool to use when blending in foundation and concealer is the Beauty Blender. The only thing I dislike about using it is how long it takes takes to blend. Feels like foreeevvveerrrr. But it works and it’s the only tool that blends everything flawlessly. I first apply my foundation and then my concealer. If I really want to highlight under my eye then I apply the concealer in a triangle formation. I also apply it on my chin, cupid’s bow, tip of the nose, and the center of the forehead. I blend my concealer with the beauty blender as well.
Step 3: Set Foundation and Concealer
 The KEY to a flawless face is setting it with powder. My favorite powder to set my concealer is the yellow shade (Lucid) in the Kat Von D Shade and Light Palette. This really highlights the under eye and makes it look flawless. To do this, I use the Real Techniques Sculpting Brush. I gently press it on the same areas I applied concealer. I NEVER blend in, just press onto the skin.
To set the rest of my face I use the NARS Light Reflecting Loose Setting Powder. You can use any kind of brush for this. I normally use a larger powder brush. I feel like the NARS powder is underrated. People rave about the Laura Mercier one, but I hardly ever see anyone mention this one. I’ve never tried LM (it’s on my list), I’m sure it’s great, but this one gets the job done too. This product also works great for the ‘baking’ technique.
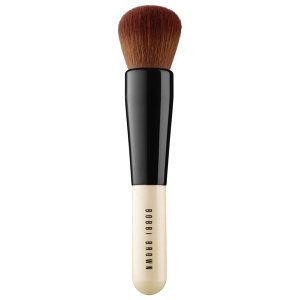
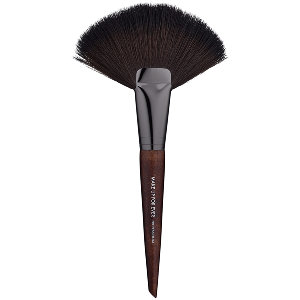
Step 4: Bronze, Blush, and Highlight
 Now the fun begins… First, I apply bronzer, the middle shade in the same Kat Von D palette. I hardly ever take the time to really sculpt my face. I’ve seen many people ask how to contour and what tool to use. I don’t think contouring is necessary more than half the time, just add a little bronzer and your good to go. I do believe the right brush is needed. I prefer to use a flat type of brush. I’ve been using the MUFE Large Powder Fan Brush. This brush is amazing and makes bronzing/contouring so easy! It allows you to create the perfect line. I also run the brush across my nose, top of forehead, and around jawline. You could also use this brush to apply blush and highlight. It’s a huge brush so it takes a while to get used to holding it. But once you do, you’ll love it!

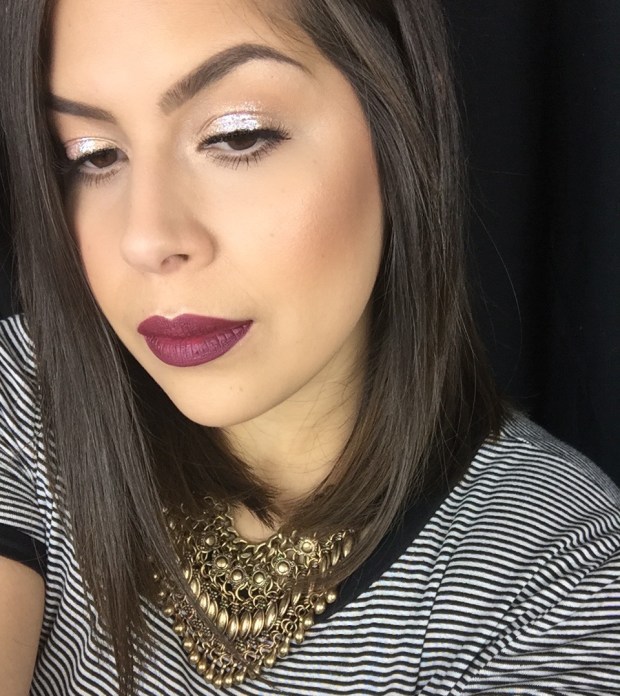
After applying bronzer, highlight, & blush
Finally, I apply blush and highlight. Those two vary from time to time. Lately I have been using a Tom Ford blush/highlight duo that came out last year in their holiday collection.
Step 5: Setting Spray
I don’t really like my face to look too powdery so I always apply a setting spray. My go-to’s are MAC Fix Plus and Urban Decay All Nighter Spray. If I want my makeup to last all day and night then I use the Urban Decay.
I also wanted to mention that if I am wearing a lot of eyeshadow, like a smokey eye, then I do that first. I normally apply the foundation, then the eyeshadow, and then the concealer. This way you can easily clean up any fallout or mistakes. You can really use that concealer to clean up the eyeshadow.
So there you have it. Those are all of the steps I do to achieve a flawless look. I usually do this about once a week. I prefer a lot less steps and makeup on a day to day basis.
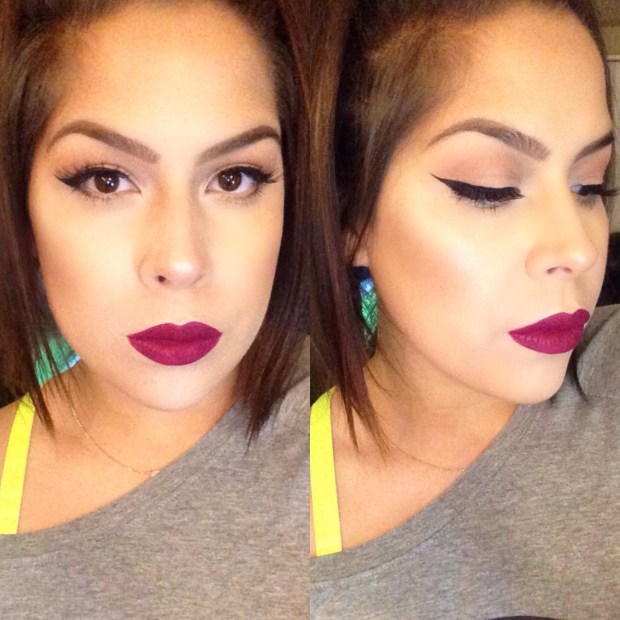
*Eyebrows: Diorshow Brow Styler, Eyeshadow: KVD Shade + Light Eye, Liner: KVD Tattoo Liner, Lips: Colourpop Ultra Matte Lip in More Better.
Thanks so much for reading. I hope this was helpful. Please do not hesitate to ask any questions!
XO, Diana


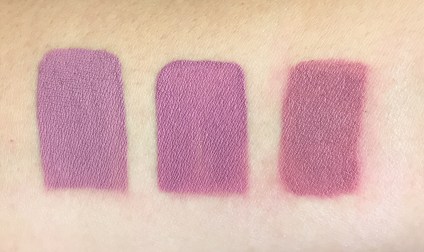


 First, can we talk about the packaging??? LOVE! I think these liquid lipsticks have the best packaging. I mean, who doesn’t love pink and rose gold? The container itself is excellent quality, very sturdy. The price is average, similar to others at $18.

 This color is what let me to make a purchase to begin with (not the name, I hate the name). It’s a beautiful medium bright pink. Like a raspberry shade. I love colors like this. They are my favorite kind of pinks to wear.
 I purchased these lipsticks last Fall so of course I had to buy a vampy shade. This one is a deep reddish brown. It’s a pretty shade to have if you don’t have anything like it! I don’t normally go for brown shades.